Happy summer! While I’m not at all a hot-and-sunny weather person, it’s undeniably exciting when summer fruits like berries and peaches start coming into season. 🍓 This year, my husband and I kicked off June with strawberry picking at a local farm and went home with a whopping 20 pounds of ripe strawberries!
I hadn’t planned ahead for how we’d manage to go through all those strawberries…oops! 😅 Of course, we got straight to eating and sharing with friends, but with the huge volume, I knew I’d want to bake and preserve some for later before they all turned moldy. Since I wasn’t prepared, I ended up having to scramble to find enough recipes (and make them) to use up all the strawberries before they went bad.
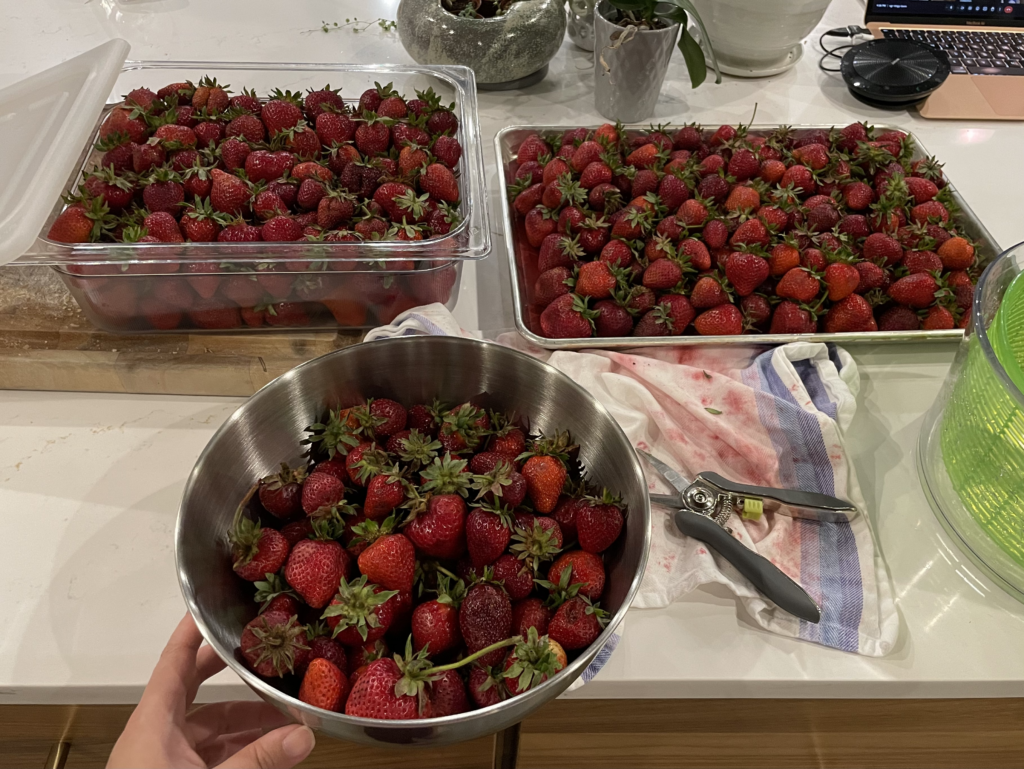
If you find yourself getting ready to pick a ton of ripe, farm-fresh fruit, I highly recommend having a collection of fruit-forward recipes prepared so you can start processing right away! For strawberry season, this delicious Strawberry Slab Pie from Pastry Love is perfect to have on your prep list – it uses a good amount of strawberries (640g per pie as written), and the pie filling is super simple and freezable for baking later. I ended up making one pie to eat and froze a vacuum-sealed bag of filling for another day.
To make the full recipe, you’ll need a bit of time to prep. You’ll be making a double batch of pie crust, blind baking it, then filling and baking again. If it’s too much for one day, you can always split up the steps into multiple days. I think the effort is worth it for this bright, fresh, flaky-crusted strawberry pie!
Making the crust
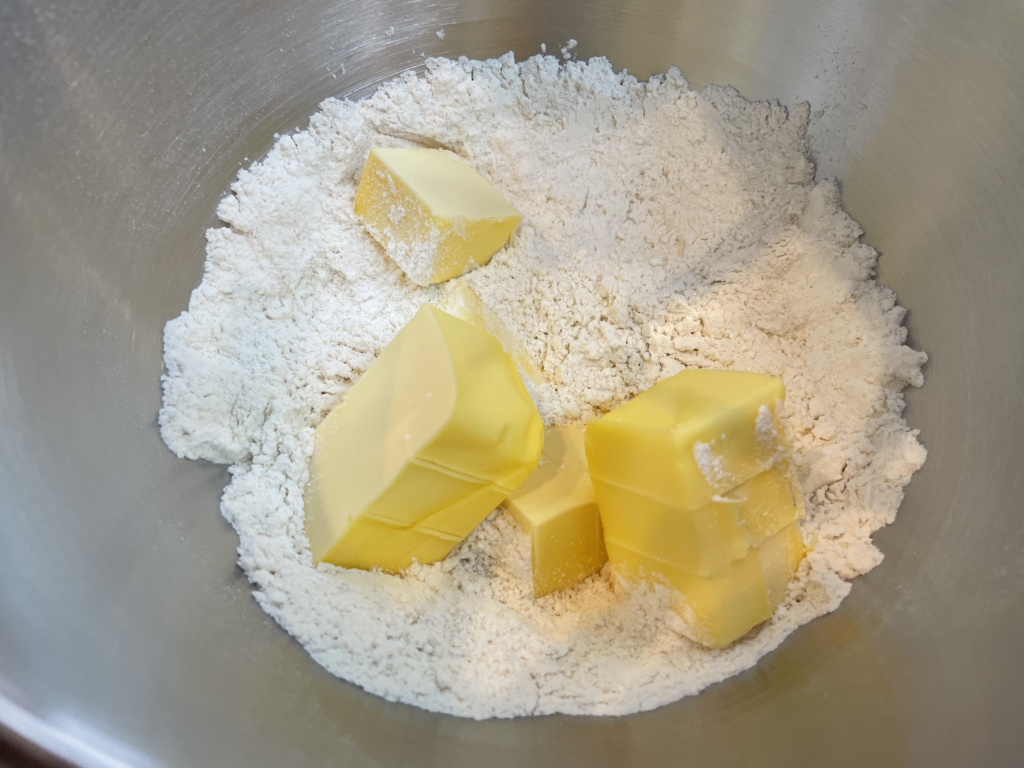
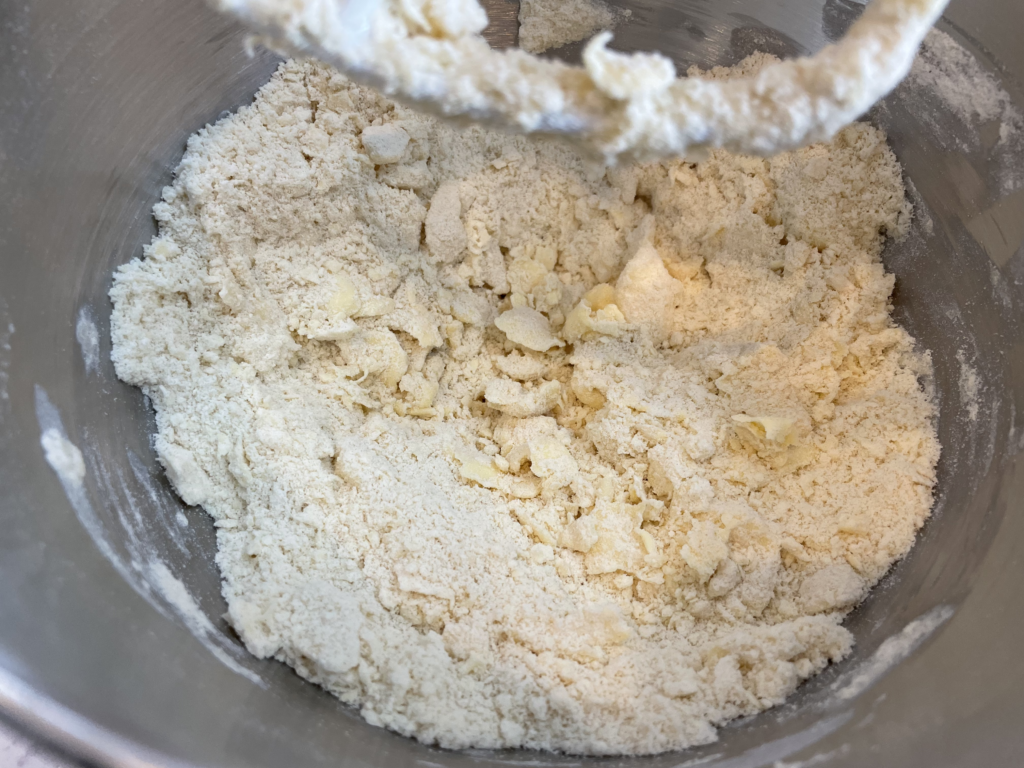
This recipe uses a double batch of the Master Double-Crust Pâte Brisée, found in the back of the book with all the foundational recipes. Since I’d be using one for the bottom crust and one for the top, I opted make each crust separately. I cut my butter into the flour using a Kitchenaid stand mixer fitted with the paddle attachment. You can also do this part easily by hand just by rubbing the butter into the flour with your fingers (beware of hot hands melting the butter!), or with a pastry blender.
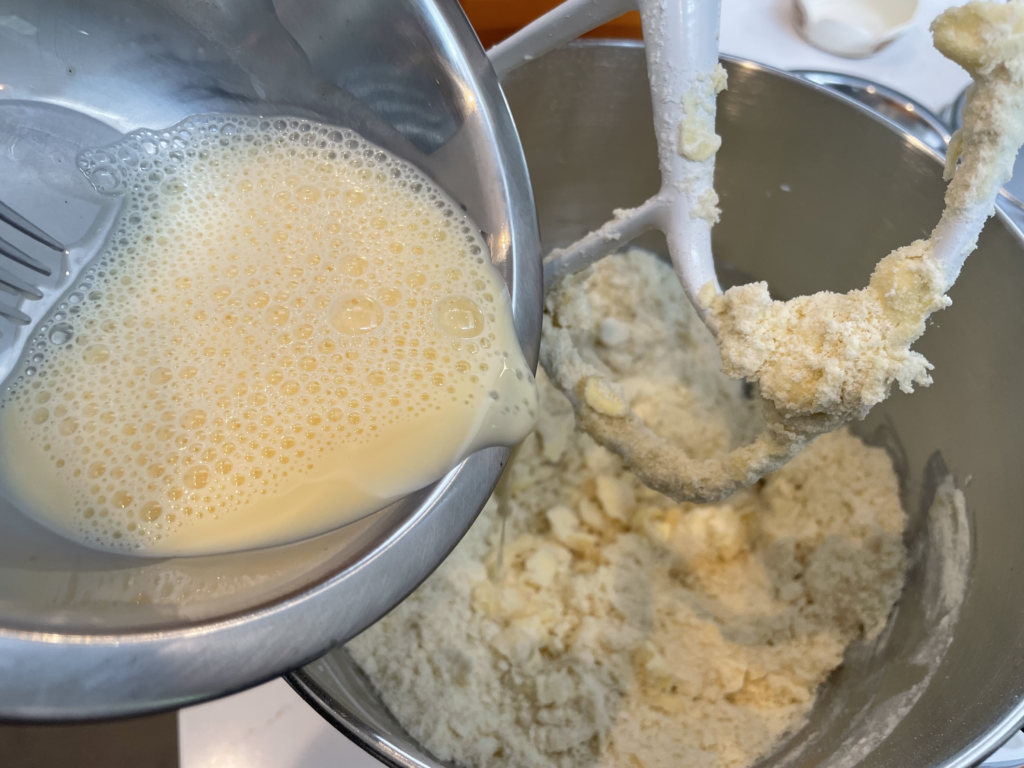
The liquid for this dough is made of egg yolk mixed with milk. I mixed it in just for a few seconds until the dough came together in clumps, with chunks of butter still showing.

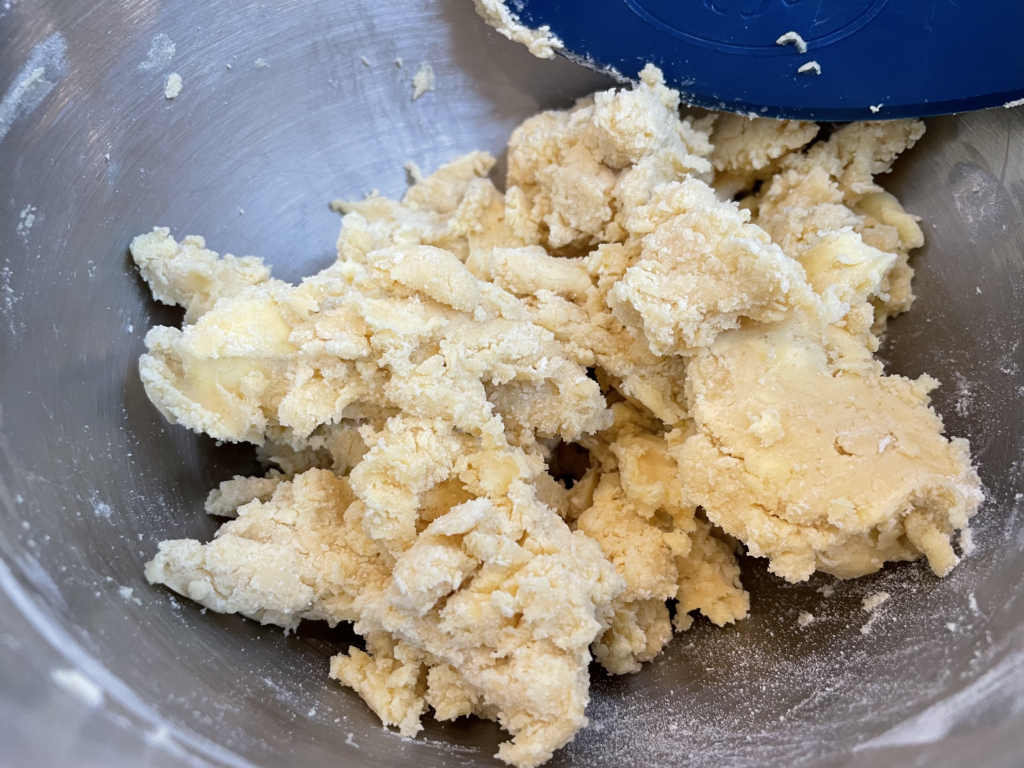
The last step in making this dough is to dump the dough crumbles out onto the counter and use the fraisage technique to finish combining all the butter and flour. In fraisage, you use the heel of your palm to smear the dough so the butter chunks flatten out into long, thin ribbons. This helps create a super flaky texture in the dough. (King Arthur Baking has an informative article about this on their blog, which also mentions Joanne Chang is a fan of this method – no wonder she included it in her book!)
After that, the dough gets wrapped and put in the fridge to rest for at least an hour. I wrapped each batch of dough separately so I could easily take one half out to roll out the bottom and one for the top.
Blind baking the crust
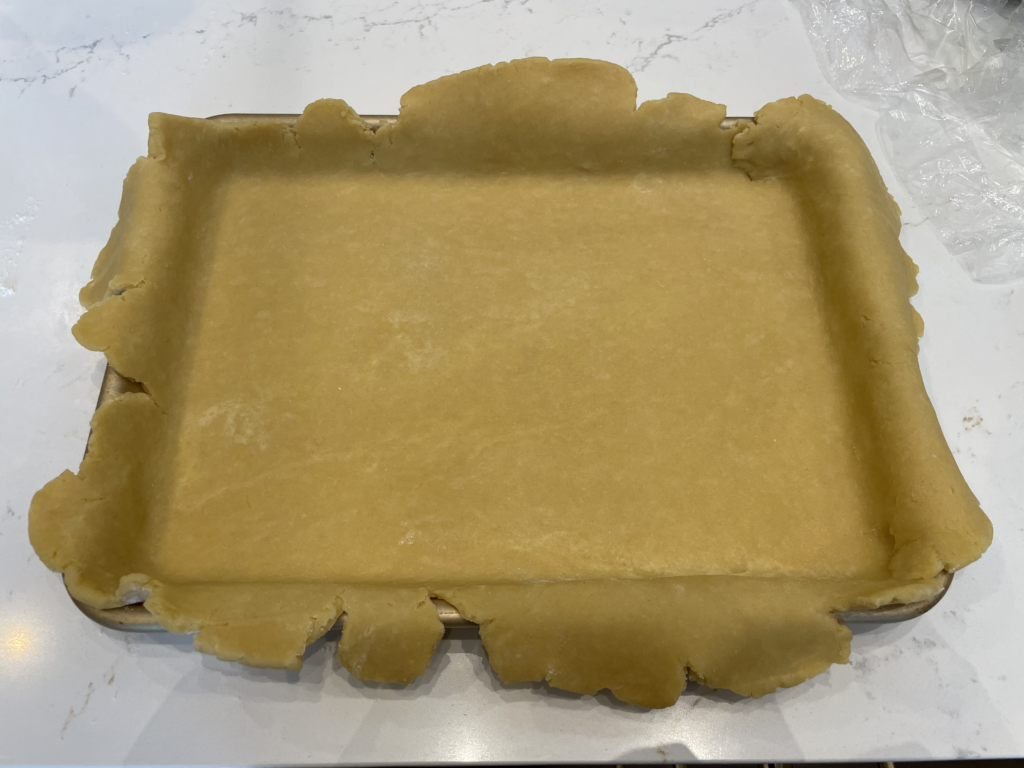
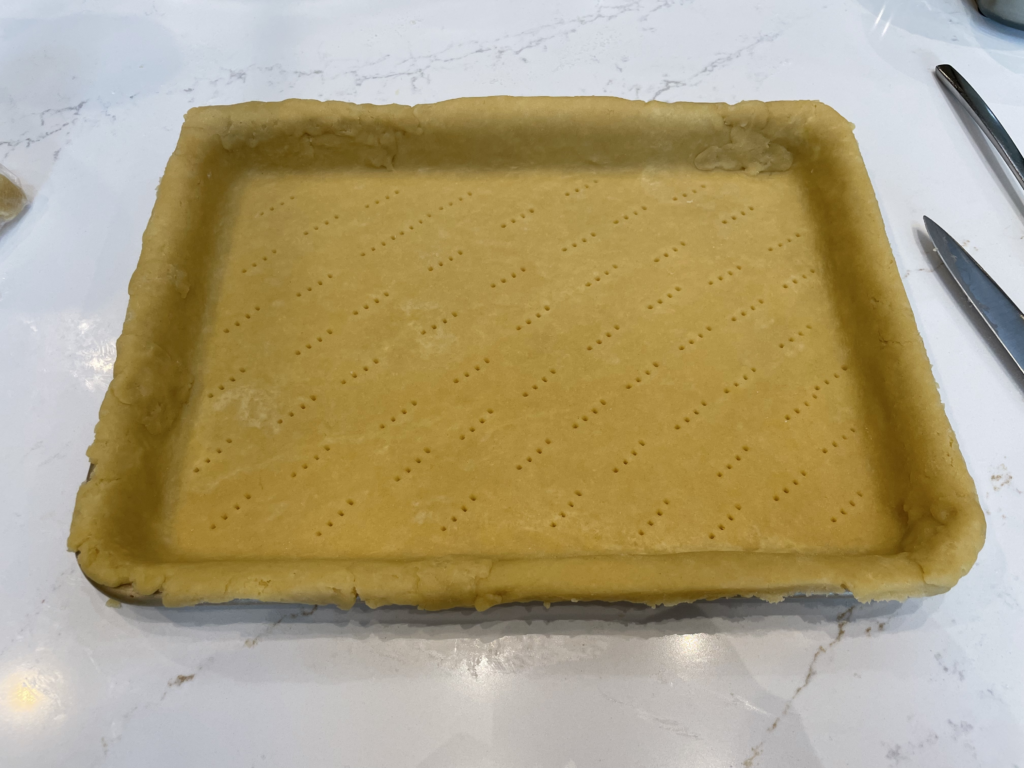
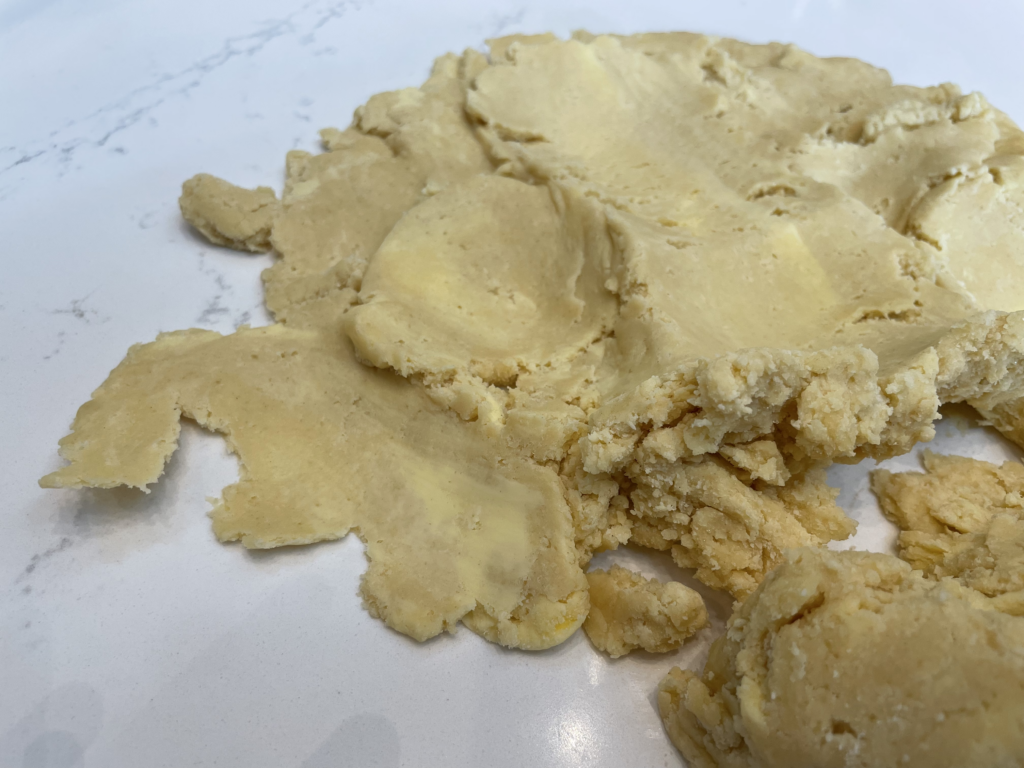
After the pie crust had adequately chilled, I took out one of the blocks of dough to roll out the bottom crust. As you can see from the photos above, I did not do an amazing job rolling a nice smooth rectangle to line my quarter-sheet pan. 😅 After trimming the edges, I used the trimmings to patch up any areas that were ripped or needed a little extra.
(Note: When patching pie crust, it’s important to smear the edges of the patch into the rest of the dough around it – otherwise, the patch may just fall off during baking.)
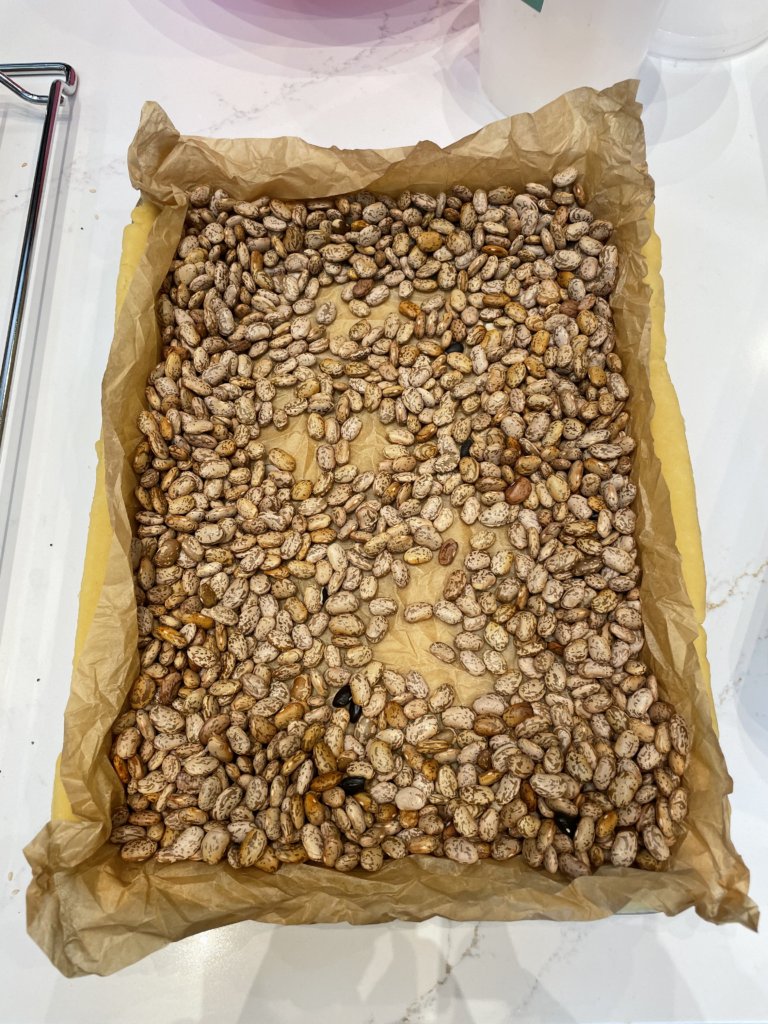
Before blind baking the bottom crust, I weighted the bottom with a crumpled half-sheet sized sheet of parchment paper and about a quart of dry beans. I crumpled the parchment paper before laying it inside the crust so that it would be softer and more easily mold to the shape of the crust.
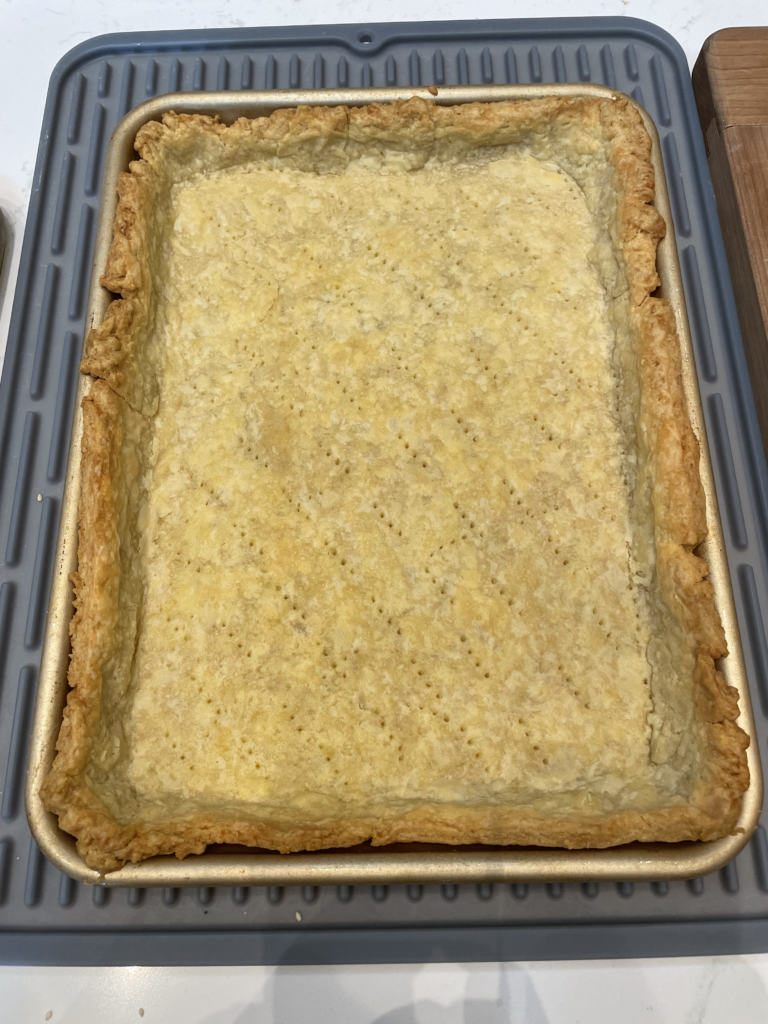
Since the beans always seem to keep the bottom of the crust from baking as much, I blind baked the crust at 350ºF for 25 minutes, removed the parchment paper and beans, and baked another 10 minutes. This allowed the sides to bake into shape and then the bottom baked to a matte, pale golden color afterward. You can see from the photos that the crust did shrink a bit during baking.
Filling the pie
While the blind baked bottom crust was cooling, I rolled out my top crust and put it back in the fridge to chill until I needed it, and then mixed the pie filling.
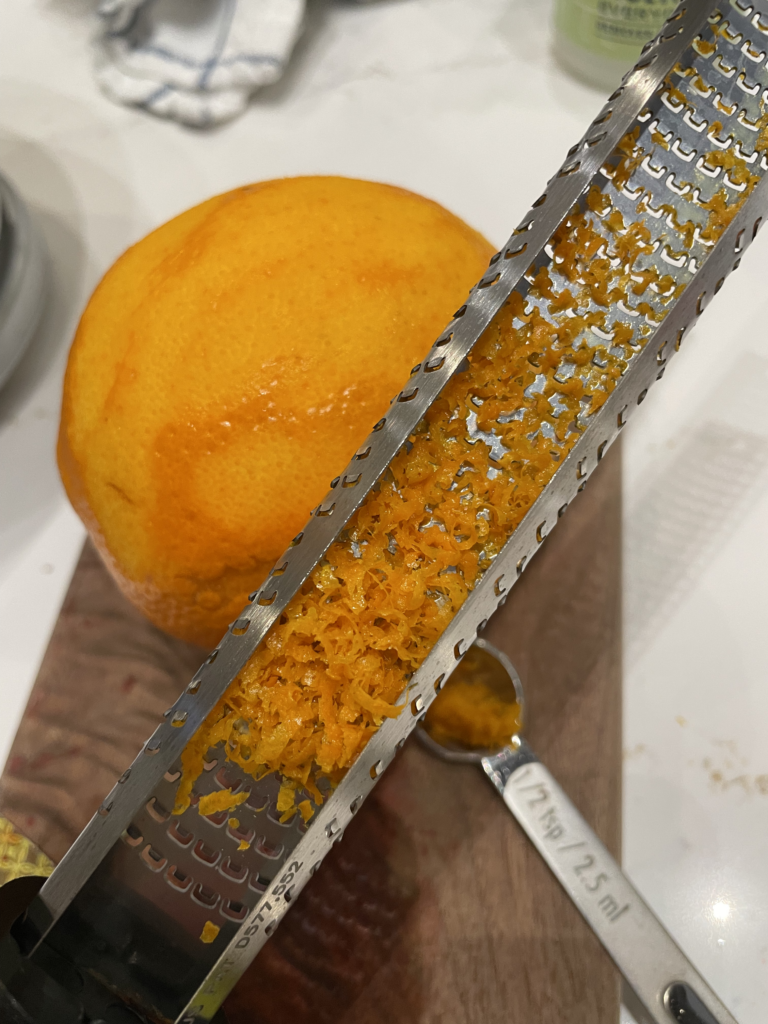
The filling for this pie is mostly strawberries (as a strawberry pie should be!), but it also includes a ½ tsp of orange zest. My favorite tool for zesting is a Microplane grater – it makes beautiful, thin strips of zest and doesn’t take too much off the fruit at once. You only want the very outer layer of the orange for zest, because you’ll get some of the bitter pith if you dig in too far. I like to zest with my Microplane on top (bottom side of of the grater facing up) so I can see how much I’ve accumulated.
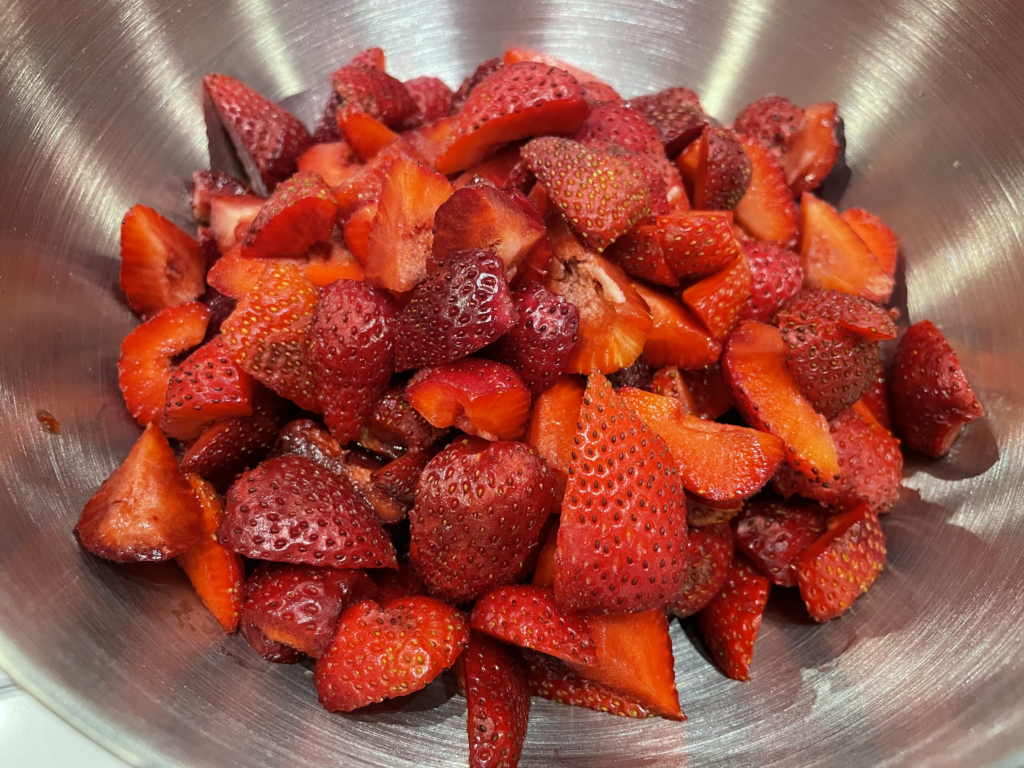
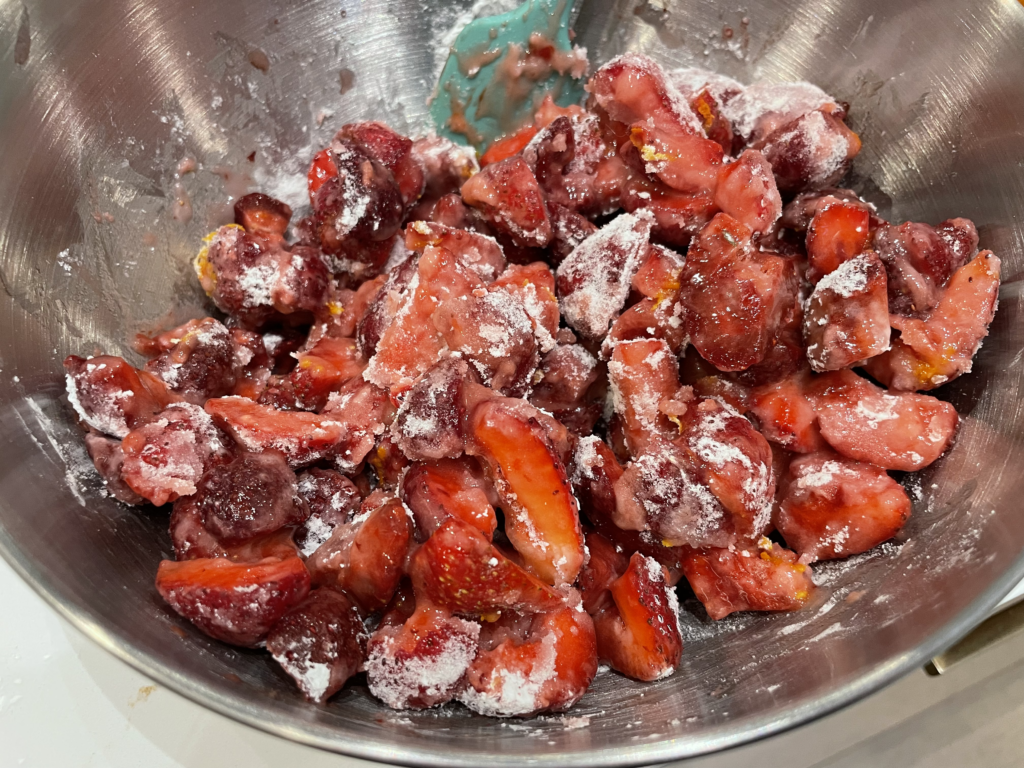
The zest gets mixed in with strawberries, sugar, cornstarch, and salt for a simple pie filling. Once mixed, macerating (letting it sit and soak) for 15 minutes helps the sugar and cornstarch to dissolve into the released juices from the strawberries and combine all the flavors.
For reference, this recipe uses ½ tsp of kosher salt, which works out to about 1.5g of salt if you’re using a different type.
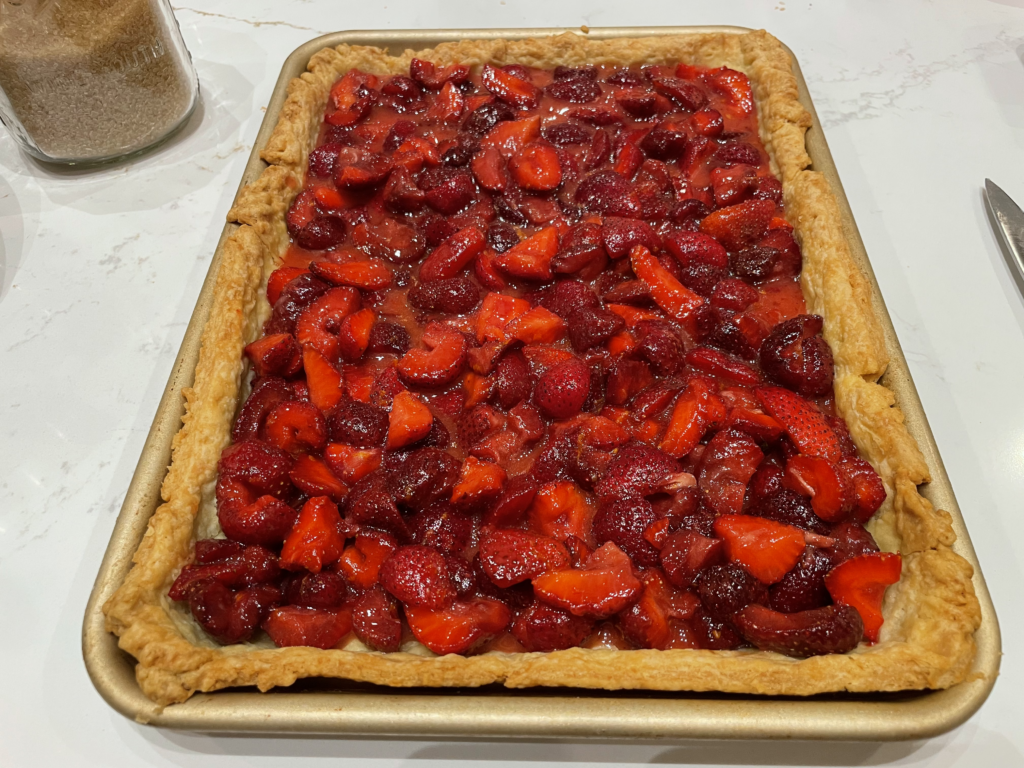
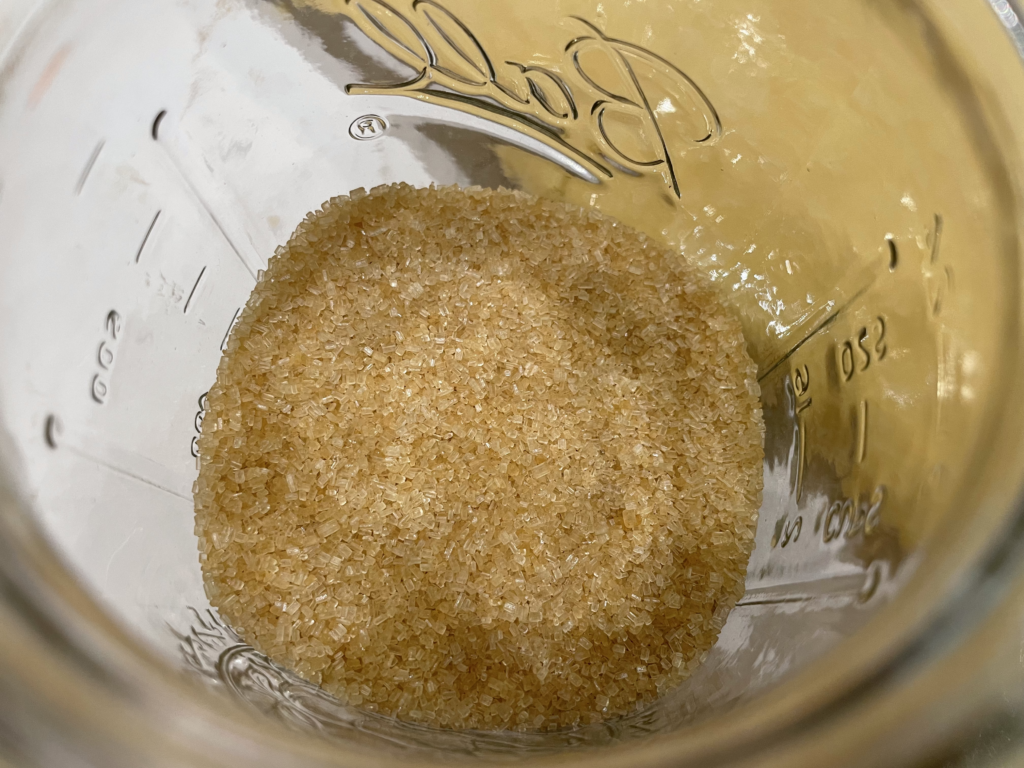
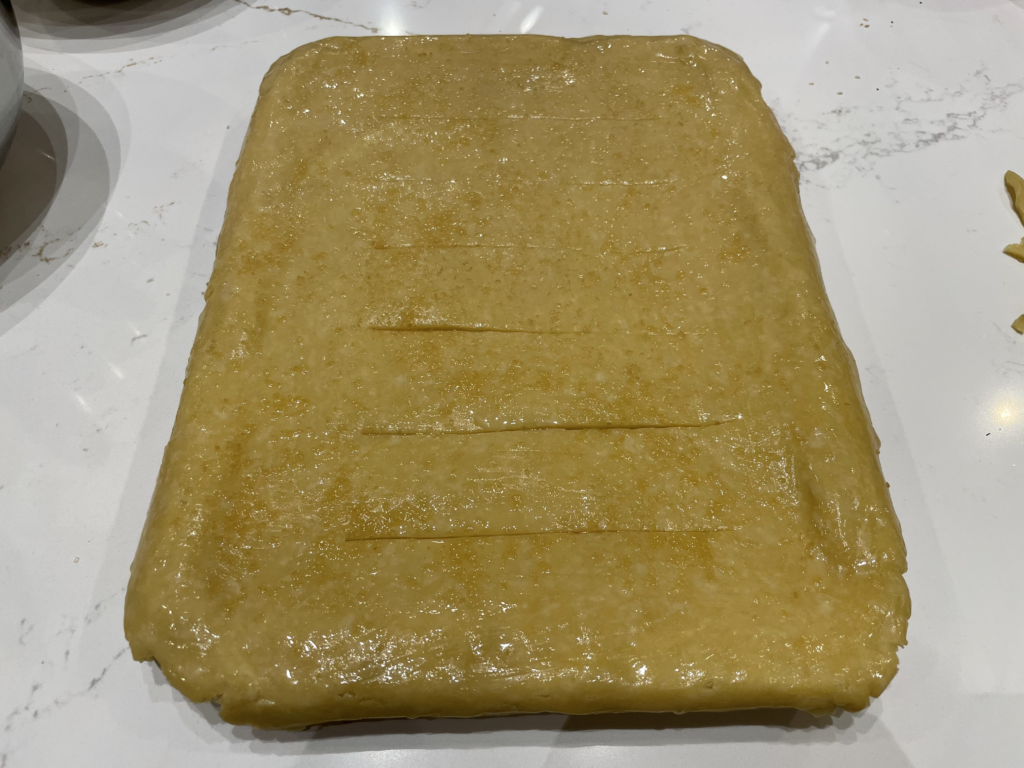
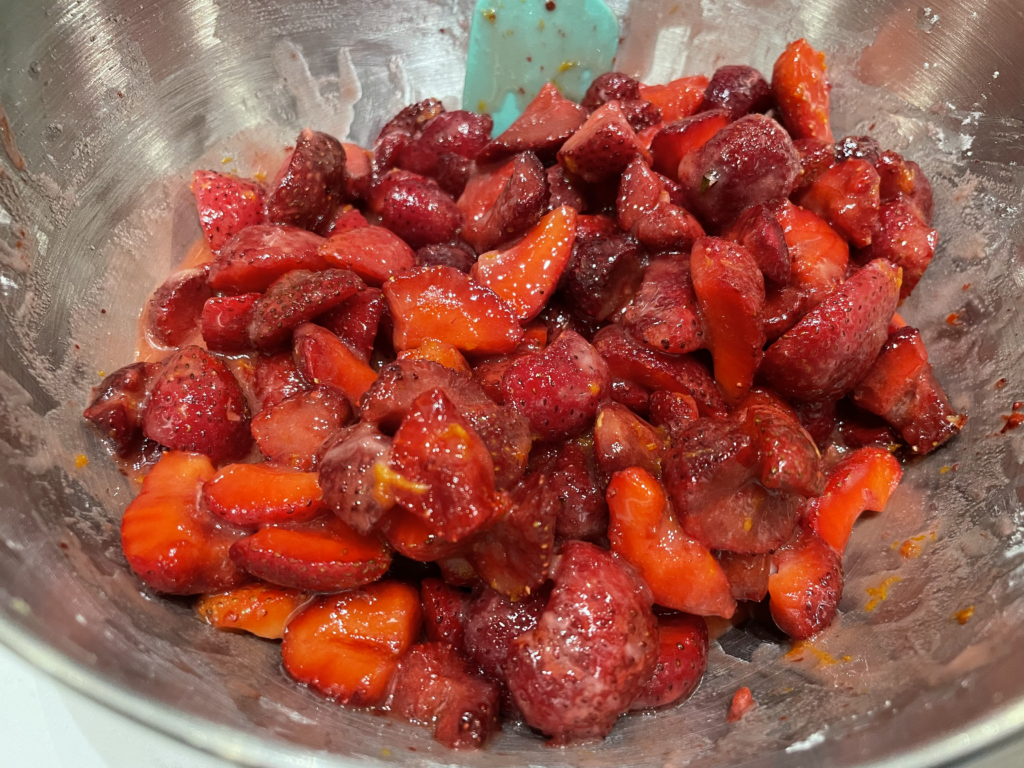
Once the filling finished macerating, I spread it into my cooled bottom crust and was delighted to see that it was a perfect volume to fill my quarter-sheet-sized crust full, but not too full. I topped it with my prepared top crust, egg wash, and some turbinado sugar. (Turbinado sugar was the closest thing I had on hand to the sanding sugar the recipe called for.)
I tried my best to press the top crust down and adhere it to the bottom crust so that filling wouldn’t seep out between the crusts. Knowing the top crust would shrink while baking, I left a pretty generous overhang of crust, but there were a few spots where the overhang came a bit short. Oops! I attempted to patch more crust onto these areas using the trimmings.
Baking & eating
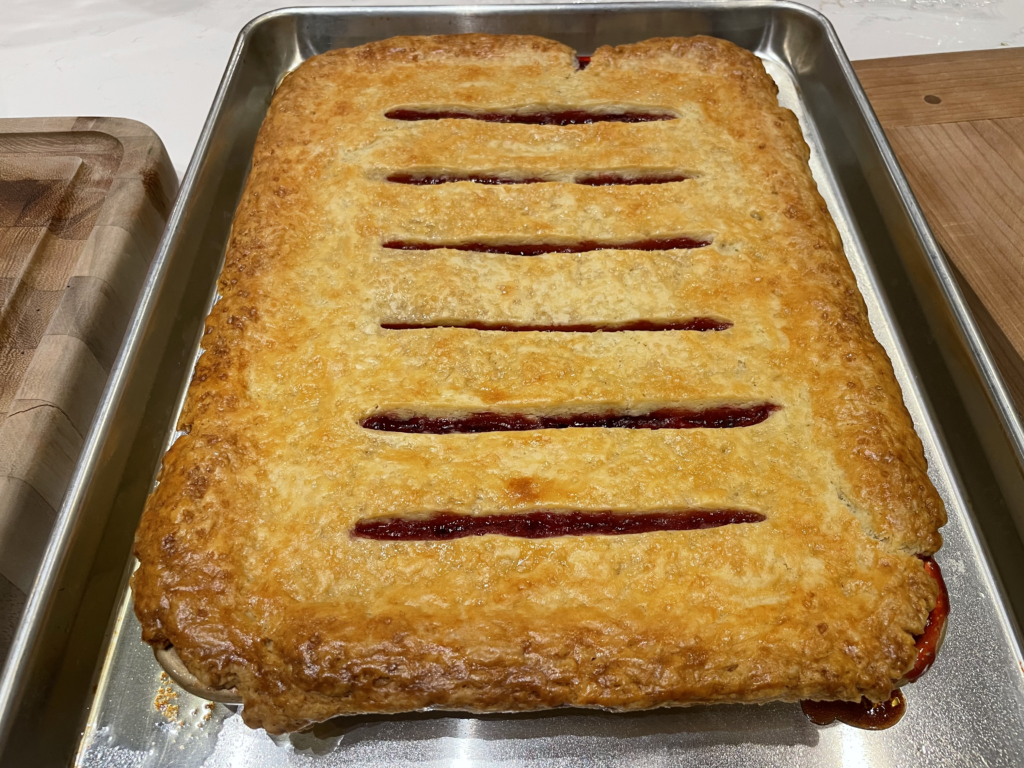

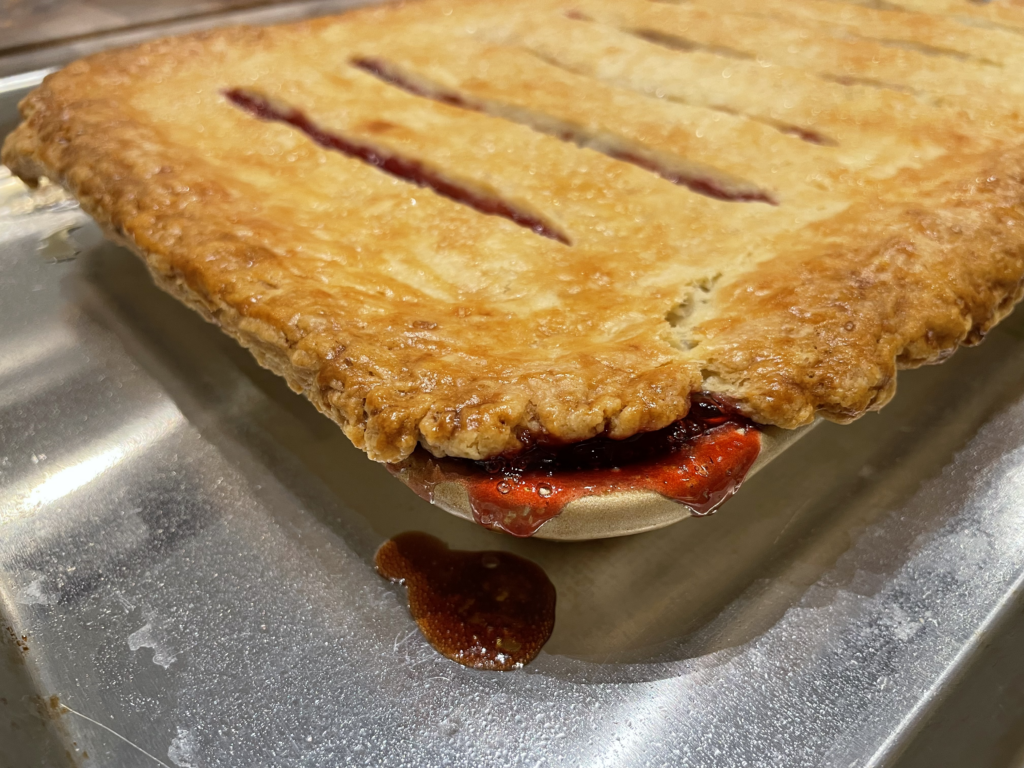
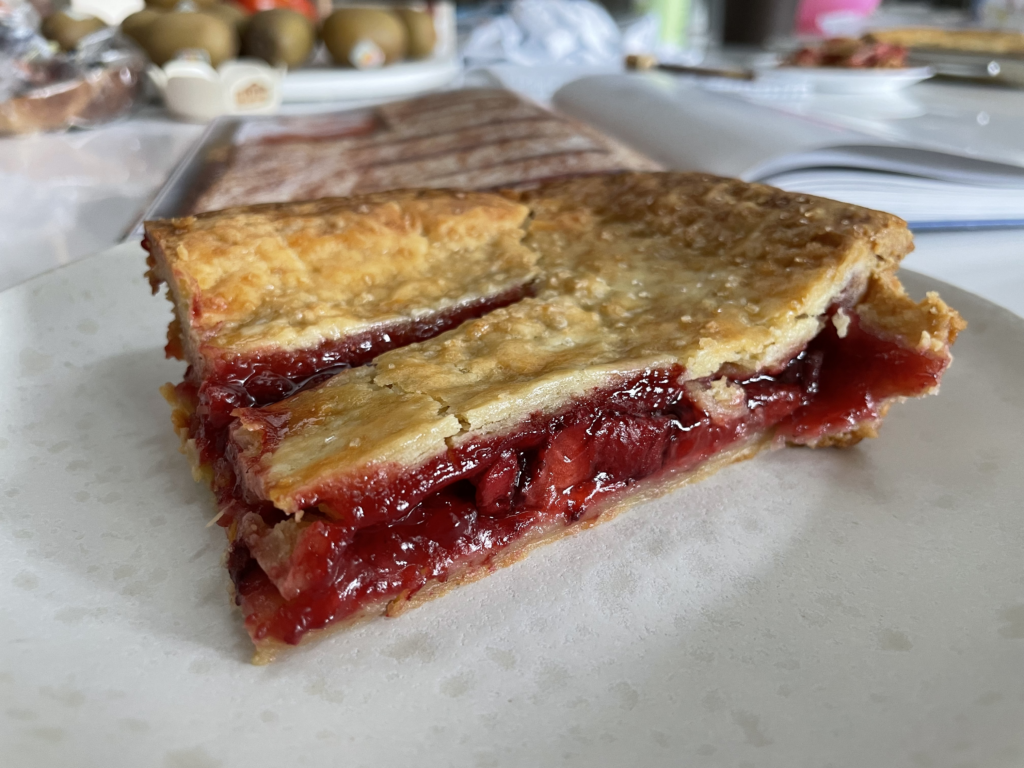
I baked the pie for about 50 minutes, though I could’ve potentially gone longer if I covered the edges to keep them from burning. The top crust didn’t get as “dark golden brown through and through” as the recipe instructed, and I think the middle part of the crust would’ve had a crisper texture if I’d baked it longer.
As you can see, my attempt to patch one spot in the top crust failed. 😣 The patch fell off and some filling did bubble out of the opening. I had another corner where the overhang of the top crust wasn’t quite generous enough, and it shrank enough that filling bubbled out of there, too. Since this pie goes all the way to the edges of the pan and can bubble out, I highly recommend baking it on top of another bigger baking pan or a piece of foil to catch accidental drips!
Next time I make this pie, I think I’ll roll both the top and bottom crusts slightly thinner and larger so I have more leeway for shrinkage and trimming.
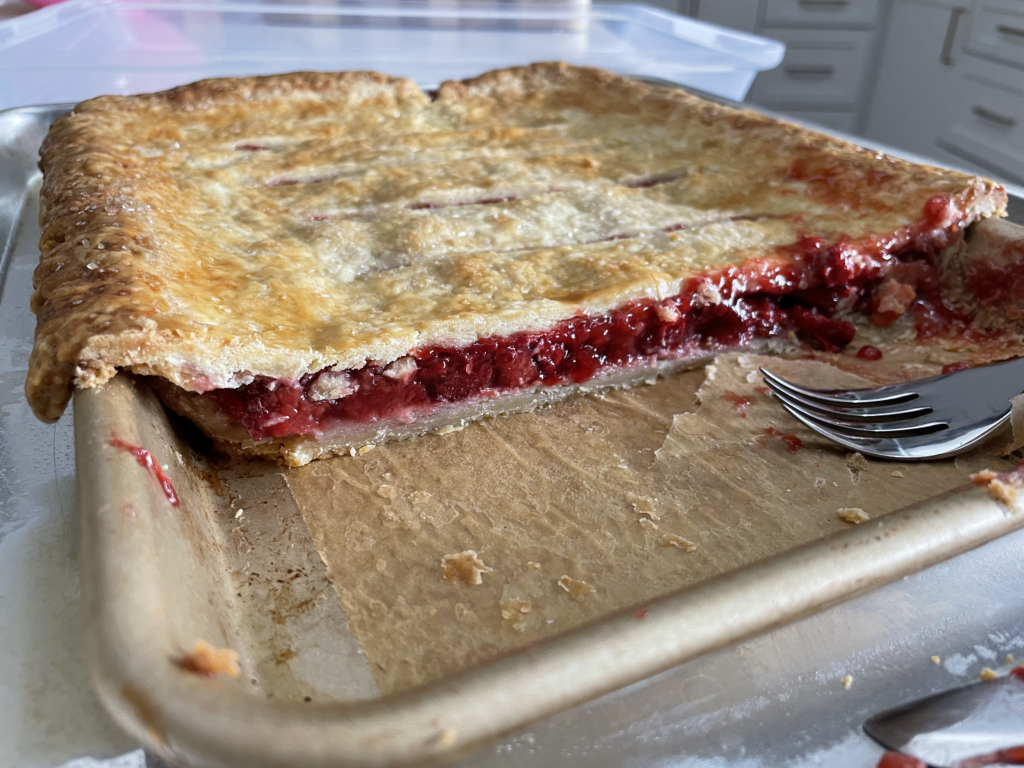
We ate our pie the next morning for breakfast. The recipe recommends serving it warmed by reheating in a 300ºF oven. I personally love cold pie, so we decided to try one slice warmed and one cold. Both were delicious and had a summery fresh strawberry taste! My husband and I actually both preferred the cold pie, but I did appreciate that warming in the oven gave the warm pie a more tender, crisp crust.
I think the addition of orange zest to the filling makes a huge difference in this recipe. It gave the filling a touch of citrus flavor that added brightness and dimension to the strawberries. 😋 Don’t skip it! I also love that since this is a thin double-crust pie, each bite has just about as much crust as filling. You get the full pie experience all the way through, and the buttery, flaky crust perfectly complements the sweet, fruity filling. I’m already looking forward to making this pie again with the extra batch of filling that I froze for later!
My tips for making this recipe
Plan ahead to fit your schedule
While this recipe involves multiple steps that can feel like a lot to do all in one day, there are lots of ways to split it up so the work fits into your schedule!
| Task | Rest time (after making) | If you want to make this part ahead… |
|---|---|---|
| Make pie crust | 1 hour | Leave the pie dough well wrapped in the fridge for up to 4 days, or in the freezer for a month. |
| Blind bake pie crust | 15 min | Leave baked crust covered at room temperature for up to a few days, or store well-wrapped in the freezer for up to 3 months. |
| Make filling | 15 min | Mixed filling should be able to keep covered in the fridge for 1-2 days. For longer storage, keep in a container or freezer bag in the freezer (vacuum sealed is best) for up to 4 months.* |
| Assemble pie | – | Store the fully assembled (unbaked) pie well-wrapped in the freezer for up to 4 months.* |
| Bake pie | 2 hours | Keep the baked pie covered in the fridge for up to 3 days. |
Please note the numbers of days or months for various storage methods I’ve provided here are generally accepted guidelines (and a few come directly from the recipe itself). Your results may vary based on your home, fridge, and freezer conditions, and your storage method. Use your judgment! While items kept in the freezer may slowly degrade in taste or quality, if well sealed, I’ve often kept them for longer with decent results.
Since cornstarch-thickened pie fillings may separate and weep after coming out of the freezer, I don’t recommend storing the baked pie in the freezer. (Unbaked filling should be fine in the freezer, since the thickening hasn’t been activated by baking yet.)