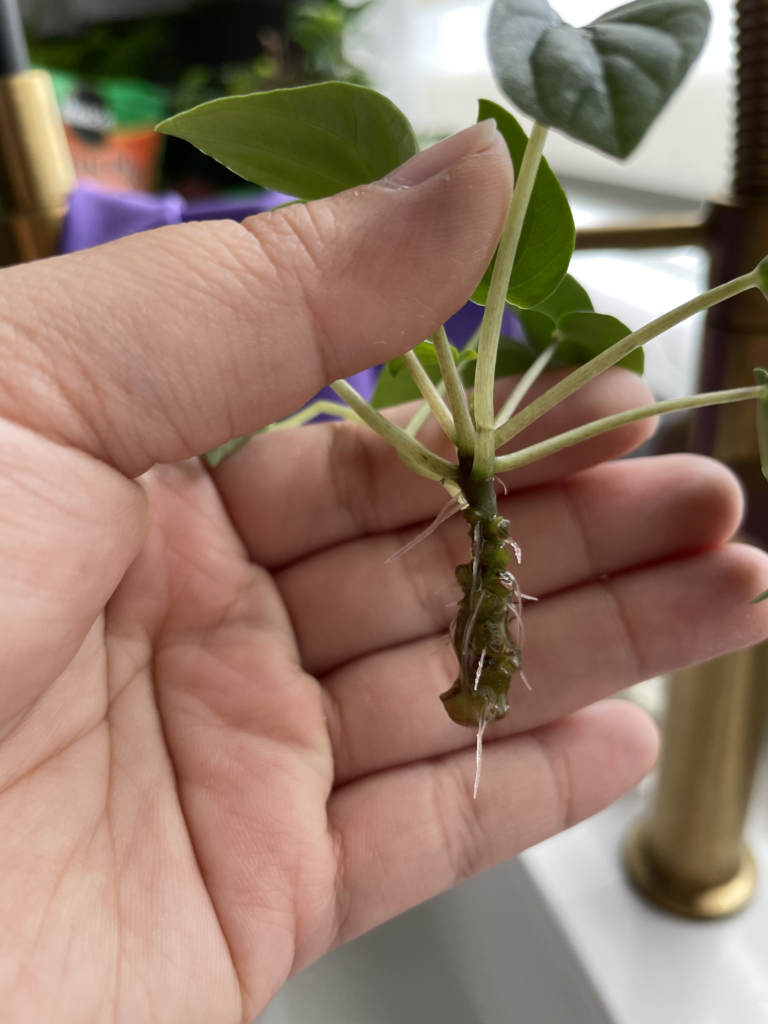
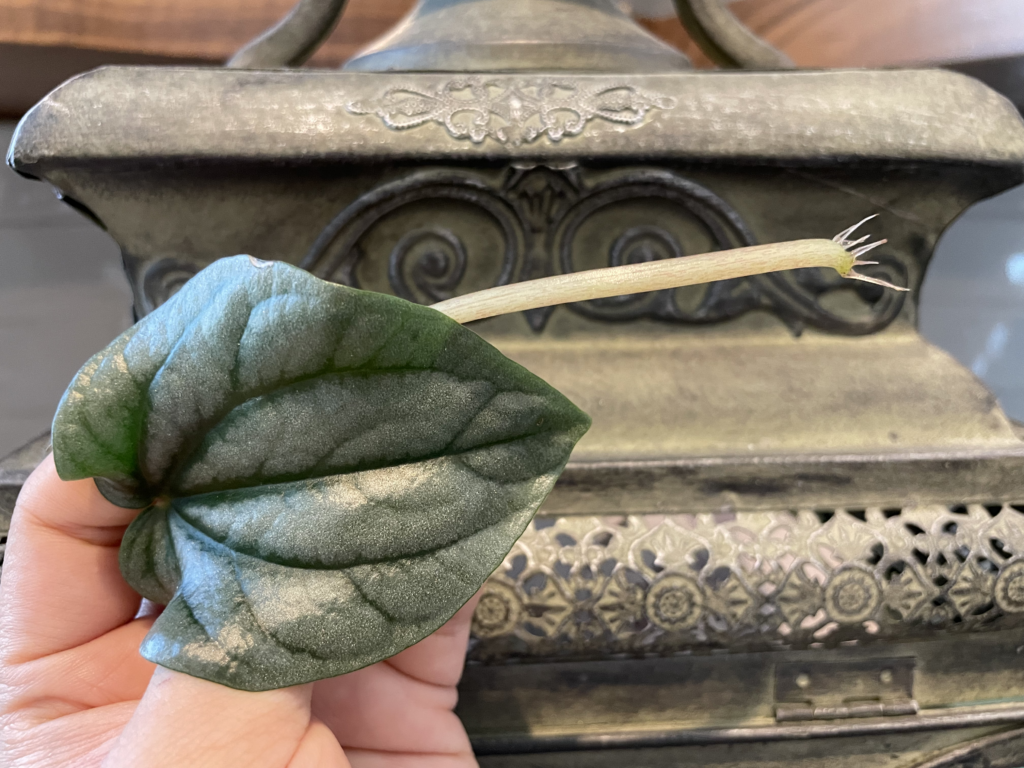
A few weeks ago, I noticed that the leaves on one stalk of my beloved peperomia frost were looking limp. That’s strange, I thought, only one stalk looks like it needs water! Out of curiosity, I poked it a little…and it came right out! The bottom was just a nub – no roots – and it looked blackened at the end. It looked as if the roots had just fallen off of my plant.
At this point, I probably should’ve suspected root rot. However, I thought rot would be brown and slimy or mushy, but my plant wasn’t slimy or mushy – just a bit dark at the end of the stalk. The rest of the plant was thriving, so I chalked it up to that particular stalk failing for whatever reason and moved on.
But then, a few weeks later, I noticed another stalk getting limp! Clearly, this wasn’t just a one-off problem. When I saw that the soil in the pot was super damp, I realized my peperomia was probably rotting.
How the Root Rot Started
So, how did this all happen, and why did it take so long for me to realize it?
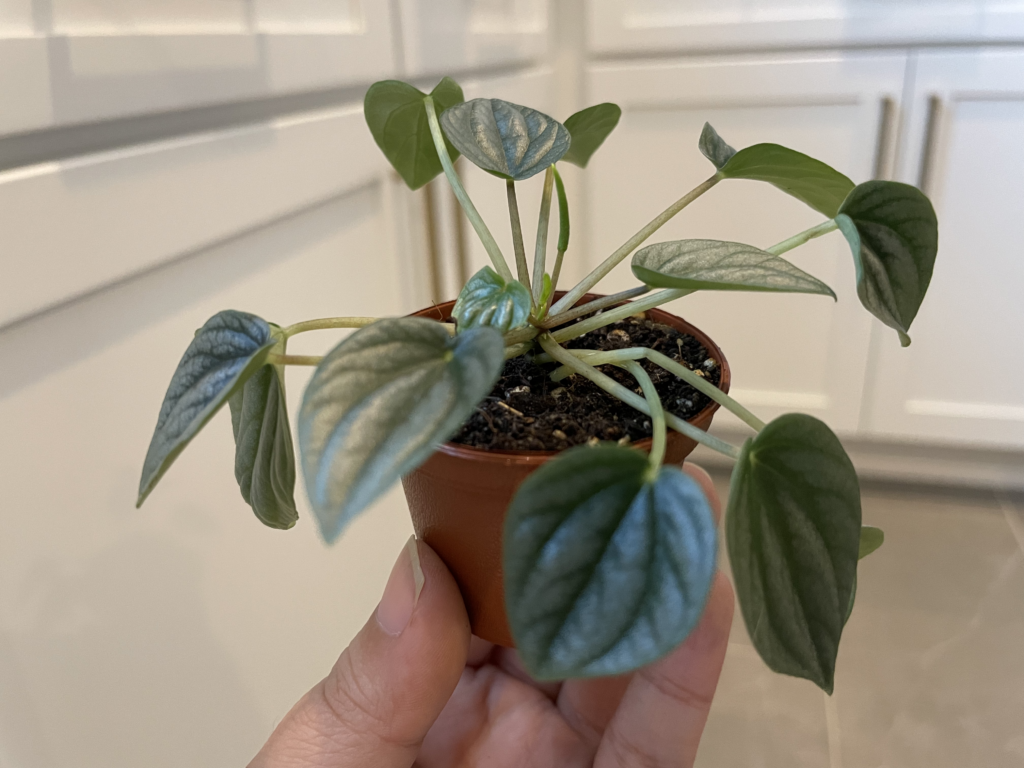
I repotted my peperomia frost back in March, about 5 months before I started noticing signs of root rot. I had separated out a few stalks into new plants, and potted the rest back into the same container.
At that time, I also set the plant up with a Blumat Classic for vacation watering. I’ve used Blumat extensively for the past few years with success, both indoors and out, so I trusted it would work well again here…and it did, for a while! My peperomia thrived, growing huge shiny new leaves and putting out a bunch of flower stalks. This robust growth made it extra confusing for me when bits of my plant started going limp.
I now suspect that the Blumat was keeping the soil too damp due to a combination of:
- plant having significantly less root mass to absorb water after dividing
- placement of the water reservoir at the same level as the plant (vs. lower to deliver less water)
- plant potted in a plastic pot that retains moisture
I still think that Blumat could work on peperomias, but this is a good learning for me to be more careful when installing one to ensure the plant won’t get too soggy!
It’s Not Too Late – Save That Plant!
It’s too bad I didn’t take picture at the time to share here, because by the time I decided to try saving the first stalk that had rotted on the bottom, it looked seriously BAD. It had been sitting in a dry container for days (or more) waiting to be tossed out to the compost, and the whole thing was completely limp and wrinkly. I honestly thought it was a goner, but no harm in trying, right?
In a nutshell, here’s the plan that worked for me:
- Cut off all the bad stuff (dark/rotted areas)
- Re-hydrate the entire plant in a cool water bath
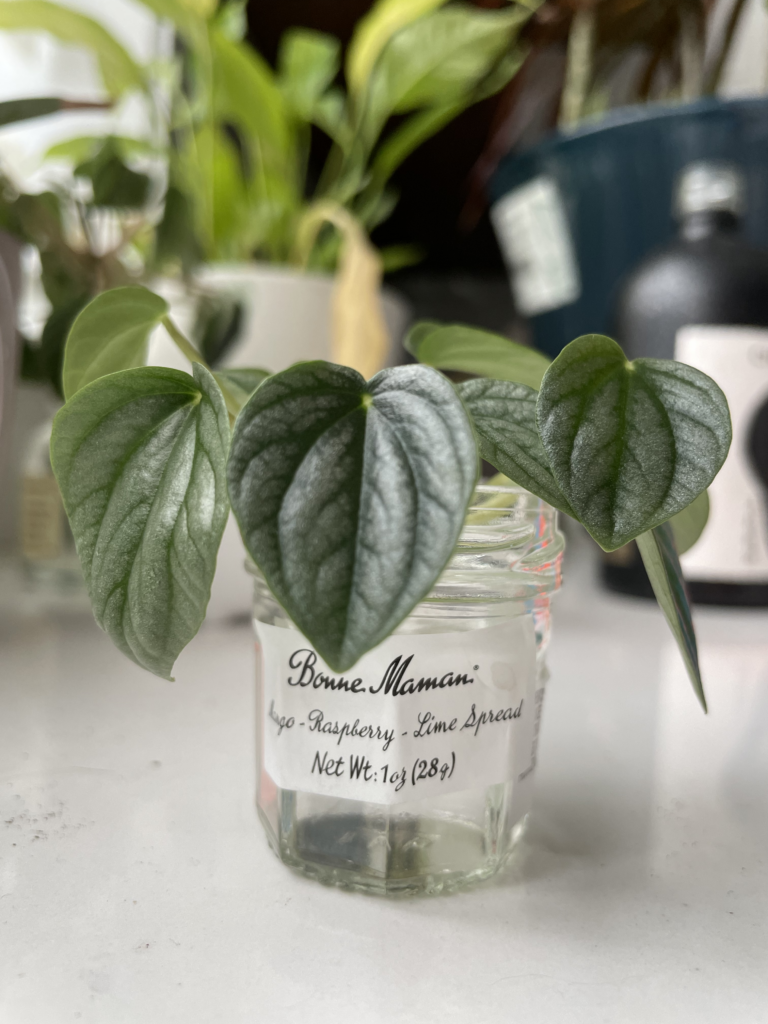
- Put the stalk into a small glass jar or bottle of fresh water
- Place in an area with indirect light
- Replace water every few days until roots develop
- Repot into soil
- Enjoy having a new, refreshed plant!
If you have a peperomia frost with root rot, I have faith that yours can recover with these steps, too!
Starting from step 3, these are basically the same steps you would take to propagate a peperomia stem cutting in water. It’s super easy and only takes a few minutes to start! After a few weeks of patience, you’ll be rewarded with a new, healthy little plant. 😊
Trimming & Rehydrating
It’s important to cut off all of the rotted areas of the plant with clean shears before putting it back in water. Otherwise, the rotted part will continue rotting. Simply cut back the stalk until no darkened areas are left.
If you have a super limp and dehydrated plant like I did, you can drop the entire plant (after trimming) into a cool water bath and leave it for a few hours or until it plumps back up and feels rigid again.
Feel free to skip the water bath if your plant is only a little droopy – it’ll perk back up when you put the stalk in water!
Growing New Roots
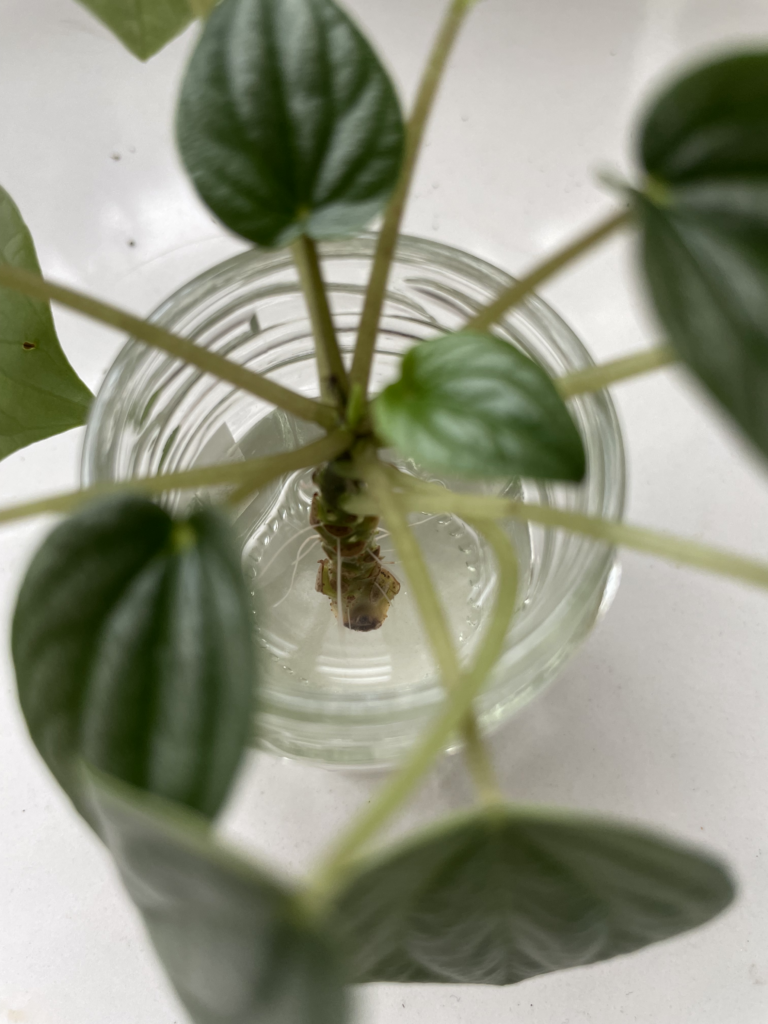
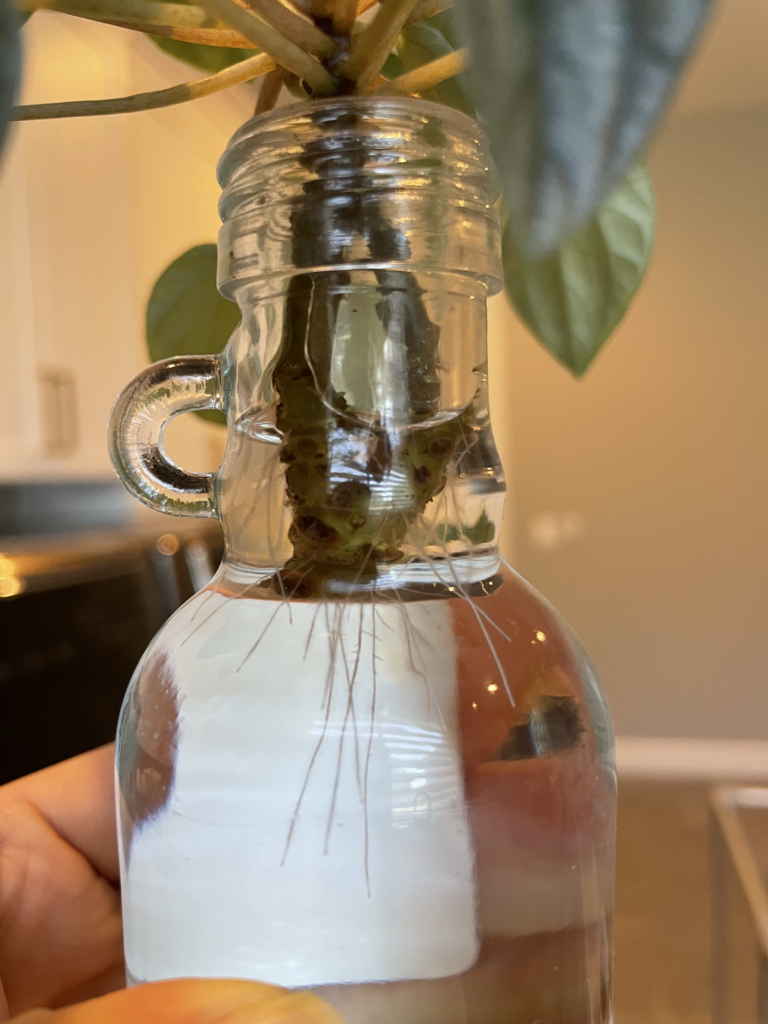
The last thing to do for now is to put the trimmed stalk in fresh water. A small jar or bottle with a narrow enough mouth to support the upper part of the plant is best. You don’t need anything fancy! I used a mini jam jar from last year’s Bonne Maman advent calendar and a tiny maple syrup bottle. (I knew saving those would come in handy one day! 😂) I like to put them by a window where they’ll get some indirect light.
This part does take a little bit of attention, because you’ll want to keep an eye on the water and replace it every few days, or at least every week, so it stays fresh.
After a week or two, you should start seeing signs of root growth from all around the stalk underwater. Once the roots have had a chance to develop, you can gently pot your plant into soil and resume care as usual. Don’t forget the root system for your new little plant is still small! I’d recommend putting it in a smaller pot for now and potting it up as it grows, so it doesn’t rot again. 😉
You could also probably grow new roots directly in soil (rooting hormone would probably help, too!), but I personally like being able to see the root development over time in water.
What About Other Peperomias?
I’m guessing this process would also work for other peperomias, but I wrote this specifically for peperomia frost because that’s what I have tested! I’ll update again if I get the opportunity to try it with others, though I’m hoping I’ll do a better job avoiding root rot in the future. 😅
2 Responses
Thank you. Love my beautiful overwatered peperomia plant. This plant had 4 plants in one pot, I now know after I removed it from the wet soil. I did cut off the bottom of the stem on 2 of the plants and have them in water. Should I cut the stem on the two other plants that look like some of the roots are surviving before putting them in water to get more roots, or just put them in water to get more roots before planting.
Hi, Janet! How wonderful to have not one, but 4 of these beautiful plants! I think if there are no rotten black spots on the ones with roots, you’re fine to leave them as-is. If there are any black spots, those will continue rotting if not cut off. Good luck!!