I love a good buttery cornbread or corn muffin, so when I saw this recipe in Dessert Person, I was super excited to try it!
Aside from the extra step of browning butter and cooking it with corn and honey in a pan, these corn muffins use the standard process you’ll find in any other simple muffin recipe, aptly named the “muffin method”:
- Mix all the dry ingredients together.
- Mix all the wet ingredients together.
- Mix the wet ingredients into the dry ingredients until just combined.
- Bake!
This recipe is simple enough for a beginner baker to follow with great results, and you can whip it up in under an hour.
Interesting side note: I used the gram measurements in the recipe for all my ingredients. In this process, I did notice that Claire put 1 cup of all-purpose flour down as 130g, while the King Arthur Baking Ingredient Weight Chart (my go-to weight conversion reference) lists 1 cup of all-purpose flour as 120g. This is why I wish all recipes would include gram weights!
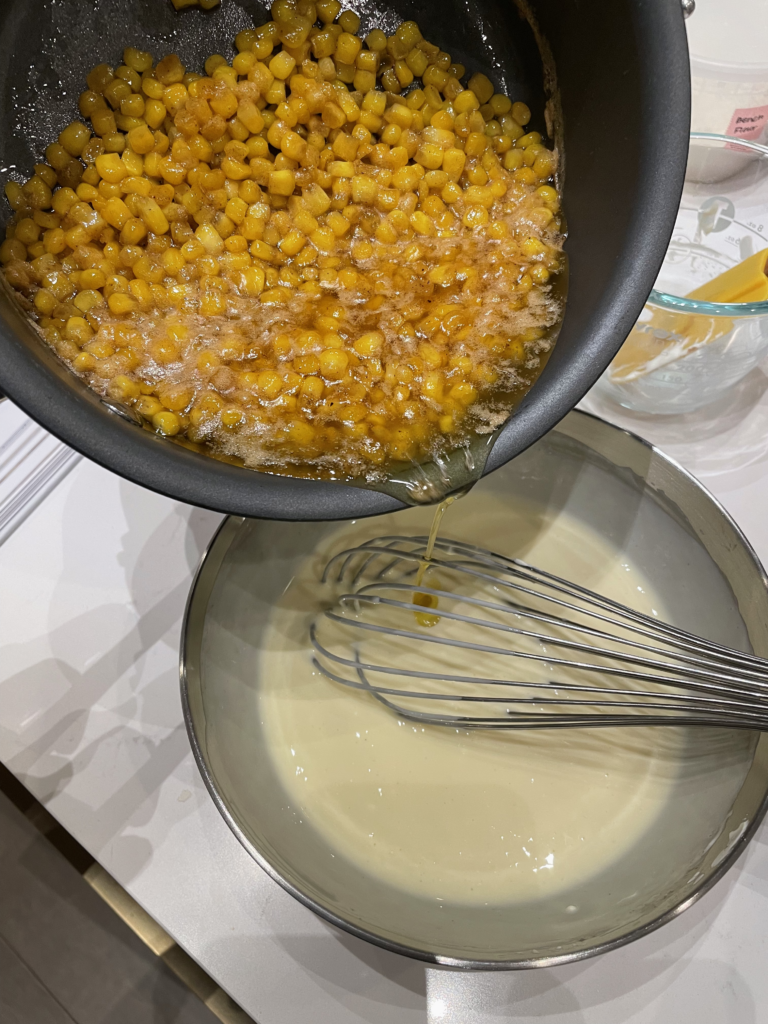
Cooking the corn with brown butter & honey
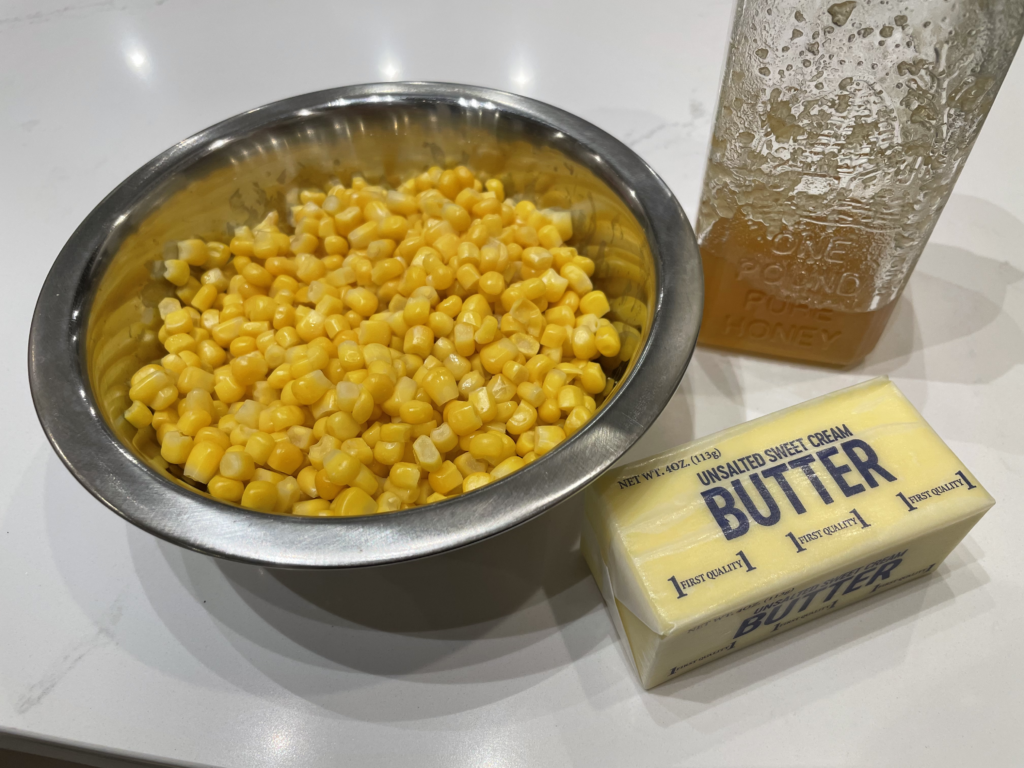
I was delighted that this recipe specifically said you can use thawed frozen corn kernels. Frozen corn is a freezer staple in our house – it’s so easy, versatile, and mess-free! Of course, you can use fresh corn as well (and I’m sure it’d be delicious), but I went the easy route and just weighed out 284g of frozen corn in a bowl and left it on the counter to thaw.
If you choose to use frozen corn, I recommend draining the thawed kernels before adding them to your brown butter, in case any water has collected at the bottom of the bowl.
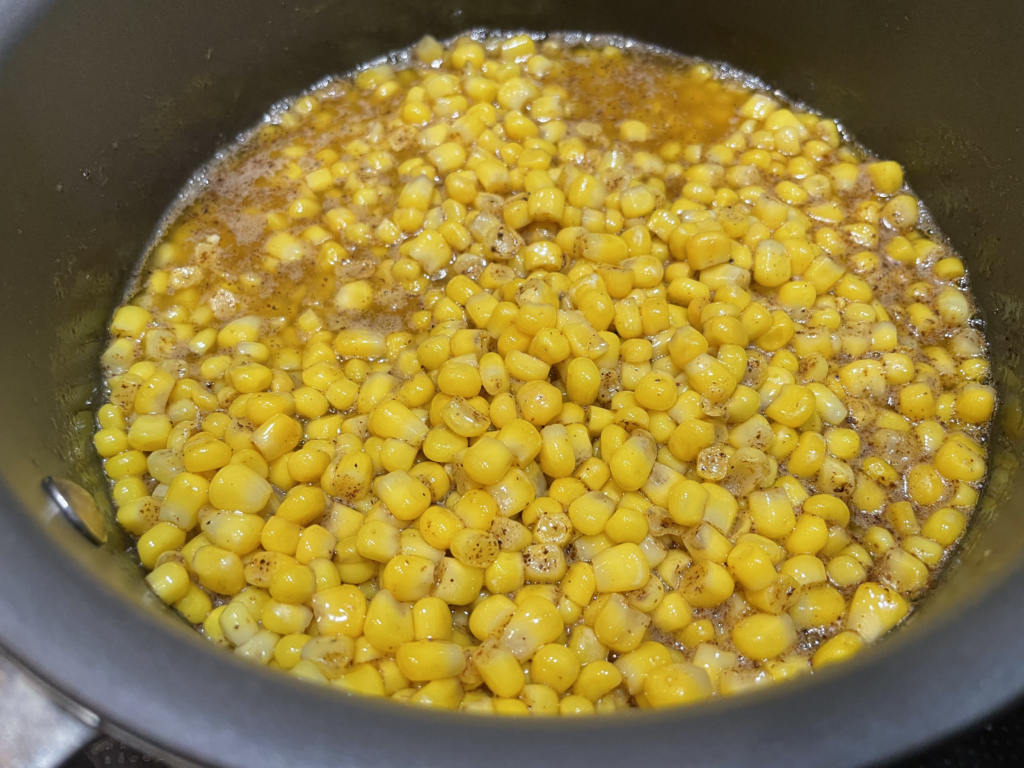
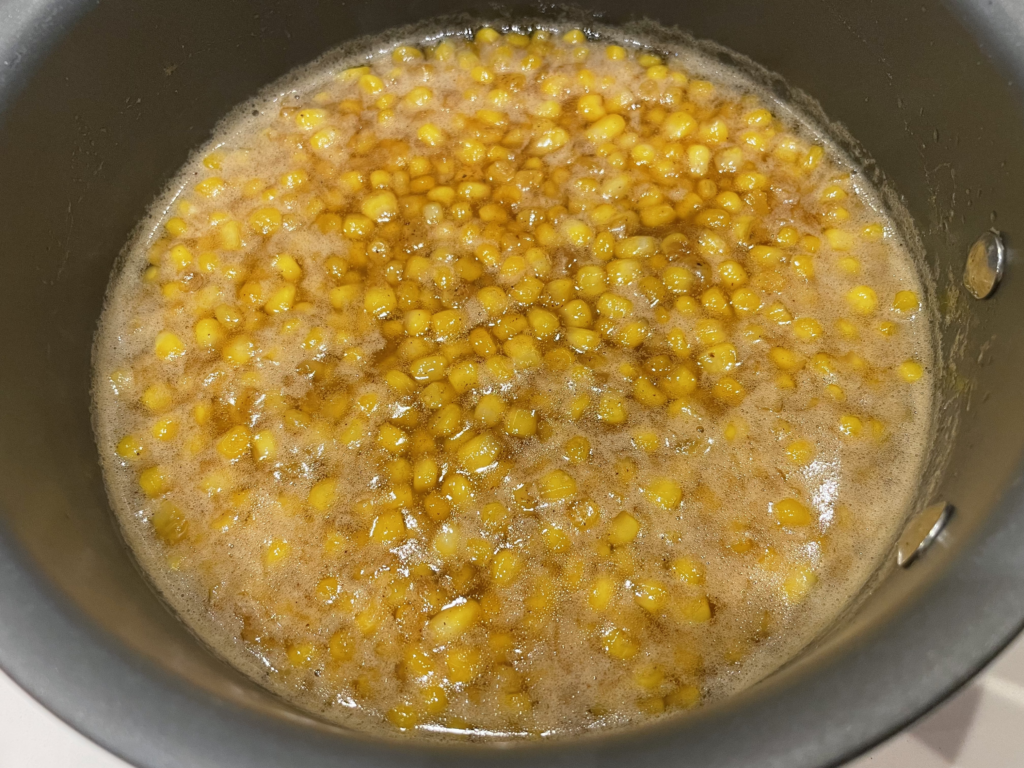
Browning butter takes a little bit of patience since you have to watch and stir it constantly, but it helps that it smells delicious! Once my butter was browned, a quick few minutes of additional cooking with corn and honey turned the mixture beautifully glossy and fragrant.
Mixing everything together
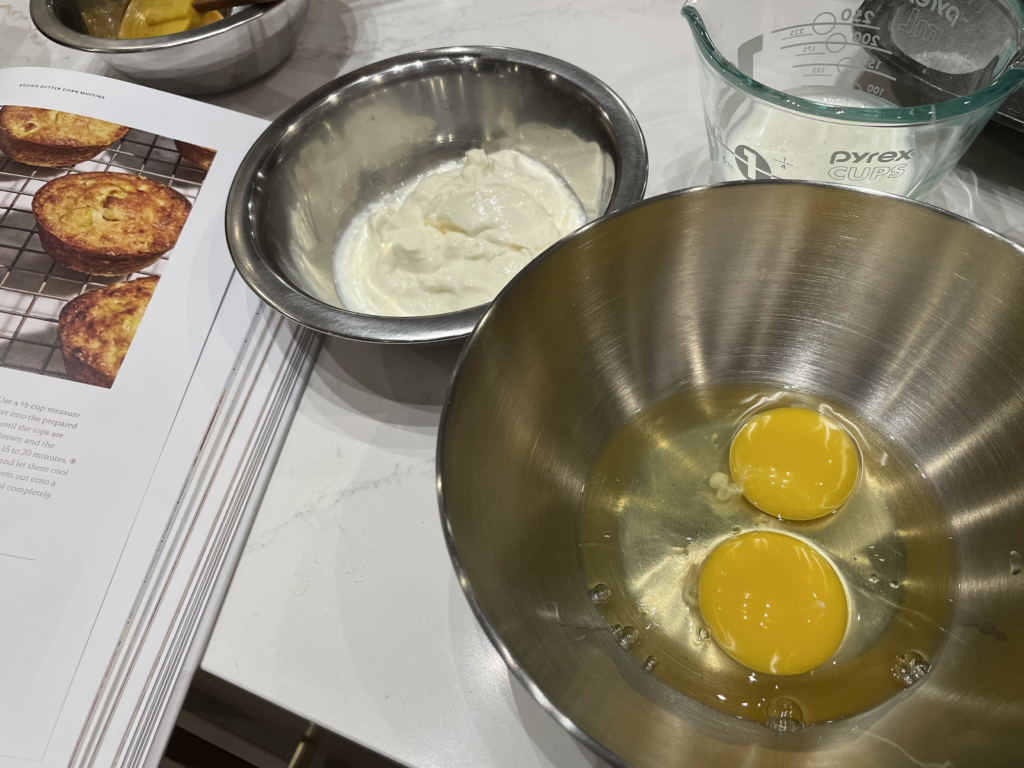
The rest of the batter came together very simply, following the muffin method outlined earlier. I gradually whisked the (slightly cooled) brown butter mixture into the rest of the wet ingredients, and then whisked the entire wet mixture into the dry ingredients.
Though the process is quite simple, one small word of caution: watch out when you pour the wet mixture into the dry mixture! Because of the corn kernels in the wet mixture, I found that it splattered a lot as the corn poured out and landed in the bowl on the counter. 😲
To control the splattering, I recommend keeping your wet mixture bowl low as you pour and use a spatula as an intermediate slide or landing pad for the corn kernels before they hit the batter below.
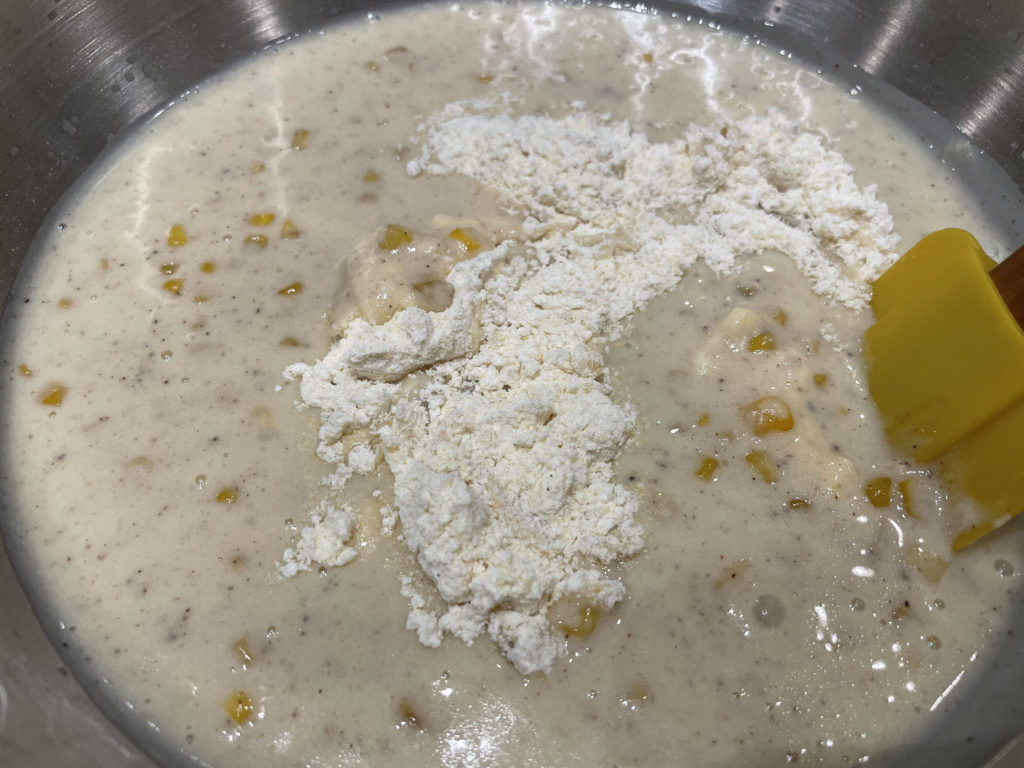
Once you’re out of the woods with the splattering corn, all the batter needs is a few quick folds with a spatula to combine everything.
Baking & eating
This recipe asks you to butter and flour your muffin pan before adding the batter. If you’re wondering how to do this easily and without making a mess, check out How to Neatly Butter & Flour a Baking Pan!
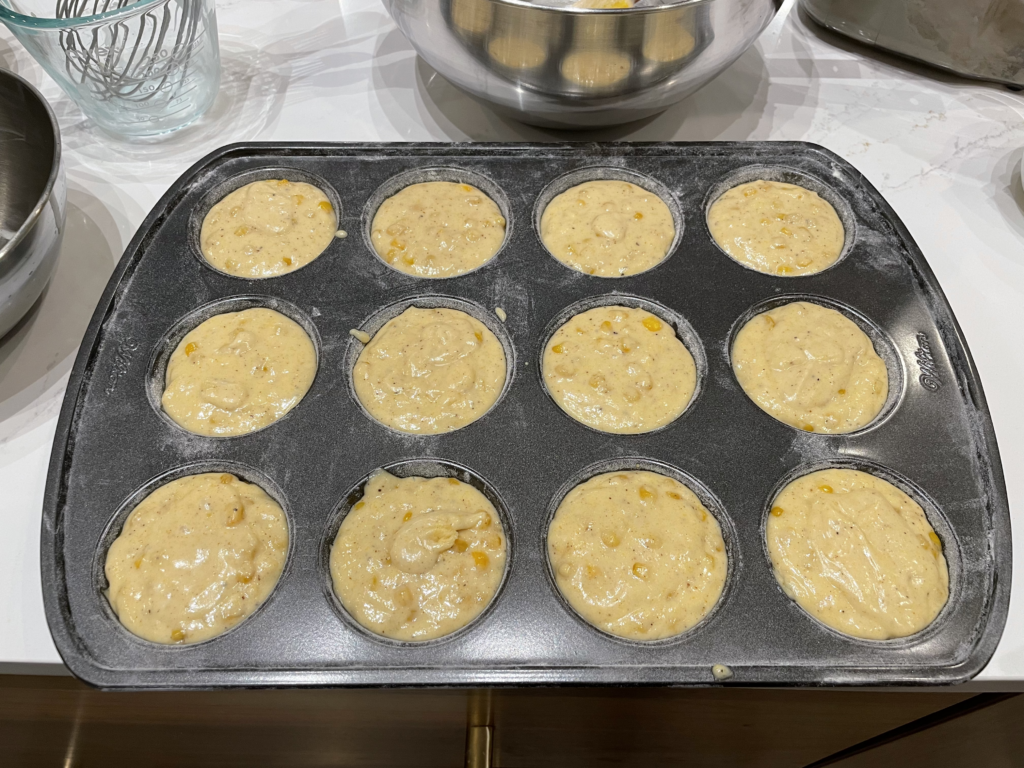
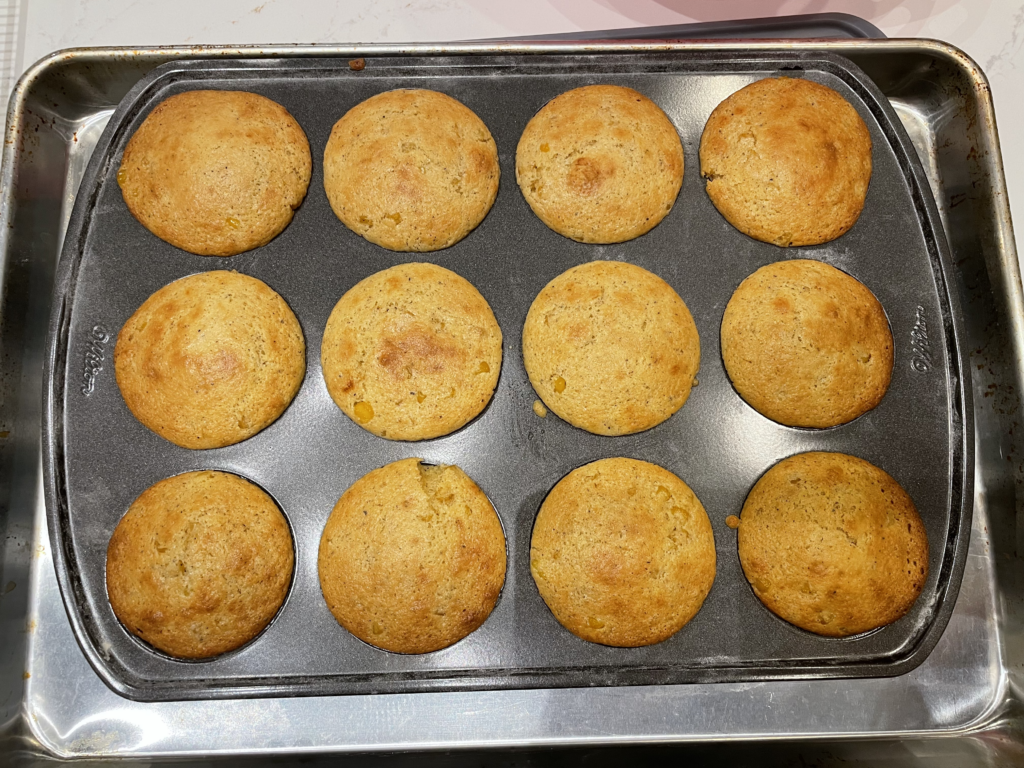
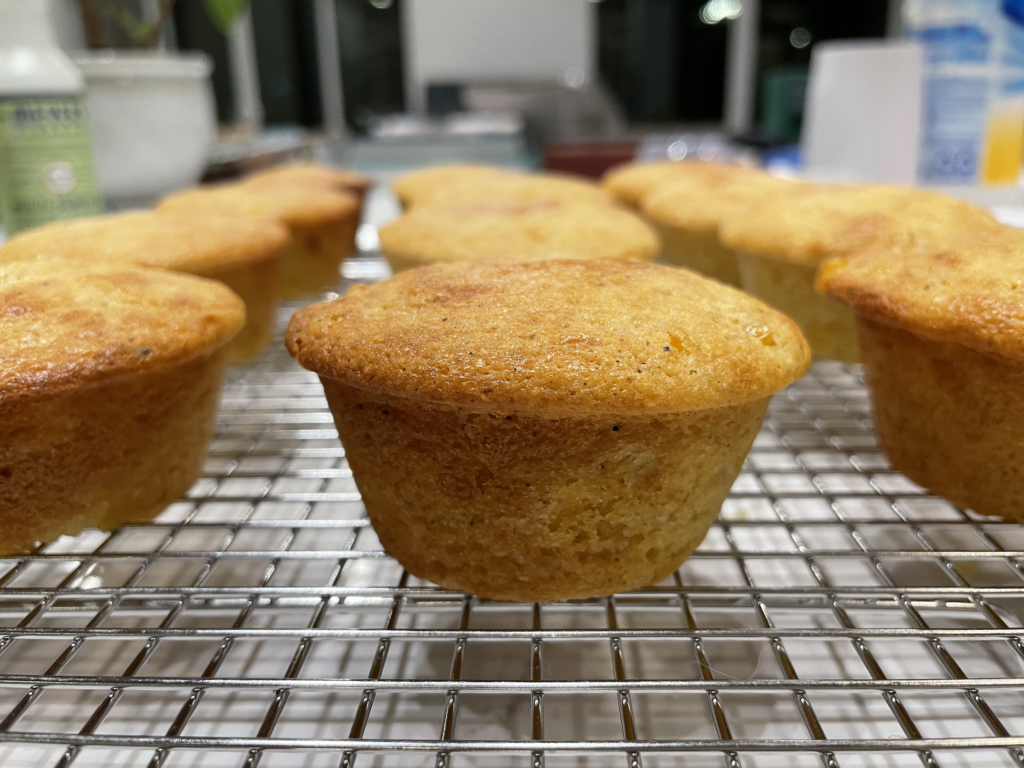
The batter fills 12 regular muffin cups to the very top. Not to worry – they don’t rise too much in the oven! My muffins were done in about 19 minutes, with pleasantly browned, lightly domed tops. They didn’t look quite as crisp as the photo in the book where the muffins look almost a little fried on the edges, but I didn’t mind. (Maybe it has to do with the amount of butter used to butter the pan?)
I did notice that the muffins in the middle of the pan didn’t brown quite as much, which is pretty typical. Baking with convection may create more even browning across the pan, but I haven’t tried that with this recipe yet.
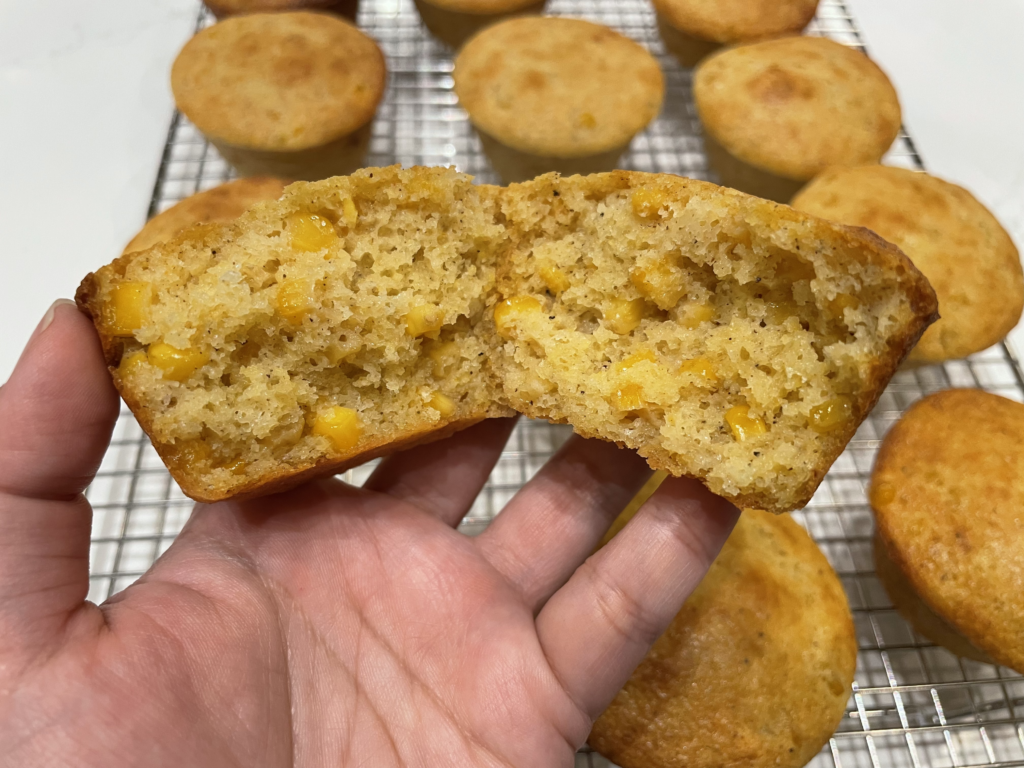
Overall, the muffins have a bouncy, eggy texture and a slightly sweet, nutty flavor. I admit I wasn’t super impressed at first bite – I thought they tasted good, but not amazing – but the winning combination of brown butter and honey lingered on my taste buds and I found myself looking forward to having more. 😂
They’re definitely very corn-forward – each muffin is chock-full of tender corn kernels, giving it a lot of texture and juiciness. If you prefer a more cake-like muffin with fewer inclusions, you might want to try adding less than the stated 2 cups / 284g of corn kernels. (I love texture in my food, but there were almost too many kernels in some of the muffins for me!)
I’d recommend eating these muffins warm for the best experience, as the butter will harden when they’re cold and make them less tender.
My tips for making this recipe
Butter and flour your pan the easy way…or maybe not at all?
Since I wanted to follow the recipe as faithfully as possible for this review, I did butter and flour my pan, and it worked great. Claire mentions in a note at the bottom of the post that she prefers buttering and flouring because “it gives [the muffins] a tasty, golden brown crust.” As mentioned in my post, I highly recommend doing this the easy, mess-free, waste-free way!
However, if you don’t want to bother with that, some of these would be great options, too:
- Pan spray
- Paper muffin cups
- Silicone muffin molds
Store extras in the freezer
Like most baked goods, these muffins store well in the freezer if you want to keep them longer than a couple of days. I like to freeze mine in FoodSaver reusable vaccum zipper bags, but you can just as easily wrap them with plastic wrap or aluminum foil and put them in a zip-top bag.
When I want to eat them, I pop them straight from the freezer to the microwave for about a minute, then toast them in the toaster oven for around 5 minutes to crisp up a little on the outside and finish heating. (You may need to adjust these numbers for your particular microwave and toaster oven.)