I finally made shaobing (燒餅)! If you haven’t yet had one yourself, I’d describe it as a delicious flat bread that is crisp and encrusted with sesame seeds on the outside, and fluffy, slightly chewy, and layered on the inside. I grew up eating frozen packaged ones from the grocery store that my mom would pop into the toaster for a quick snack, and when we went to visit family in Taiwan, I relished the fresh shaobing we’d get from street stalls, either plain or stuffed with egg and other yummy goodies.
I’ve been curious to try making shaobing from scratch for several years now, actually, but it never quite made it to the top of my baking list. However, I was recently craving the shaobing from my childhood, and was so excited to buy that familiar package of frozen shaobing from the grocery store…but alas, when I bit in, it was tasteless and dense. Not at all like I remembered! 😞 It’s been so long since I had it, though, I honestly can’t tell if the product has changed, or if my taste buds have!
Unlike in Taiwan, shaobing isn’t a common food you can just get anywhere here (anyone know a good place to get it in the Pacific Northwest? Let me know!), so I finally decided it was time to try making my own.
I perused our collection of Taiwanese cookbooks hoping to find an authentic recipe somewhere in there, but to my surprise, none of them featured this classic staple! So, I turned to the internet and discovered this shaobing recipe on Cooking in Chinglish, a new-to-me Taiwanese cooking website.
Making the Dough & Oil Paste
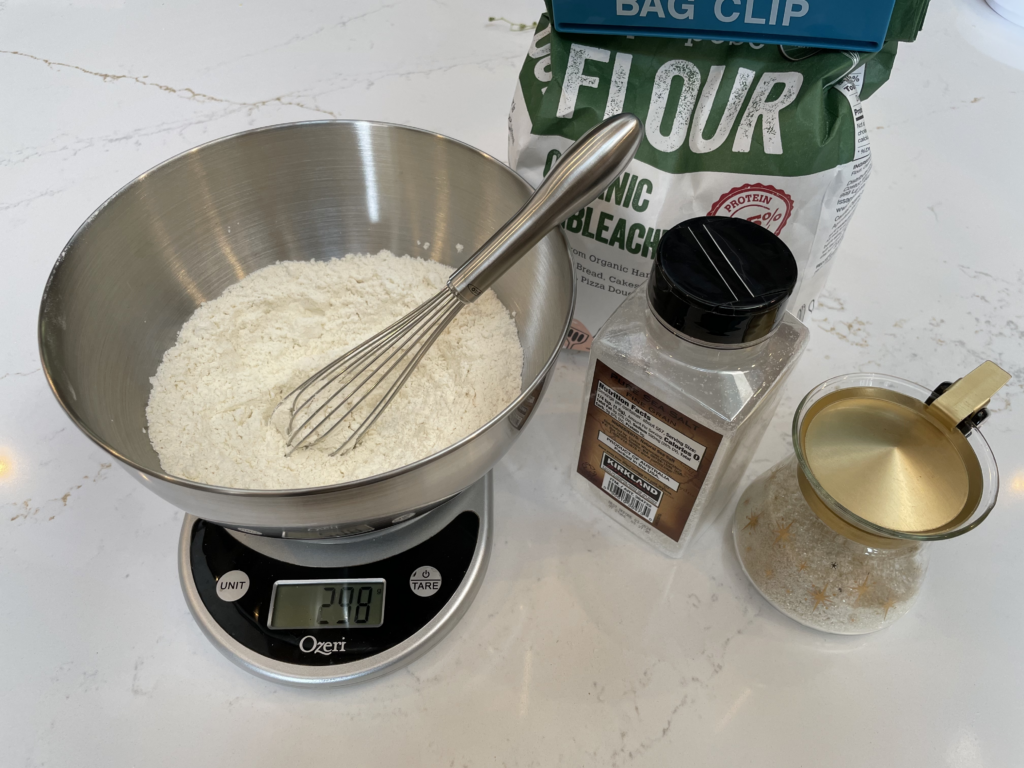
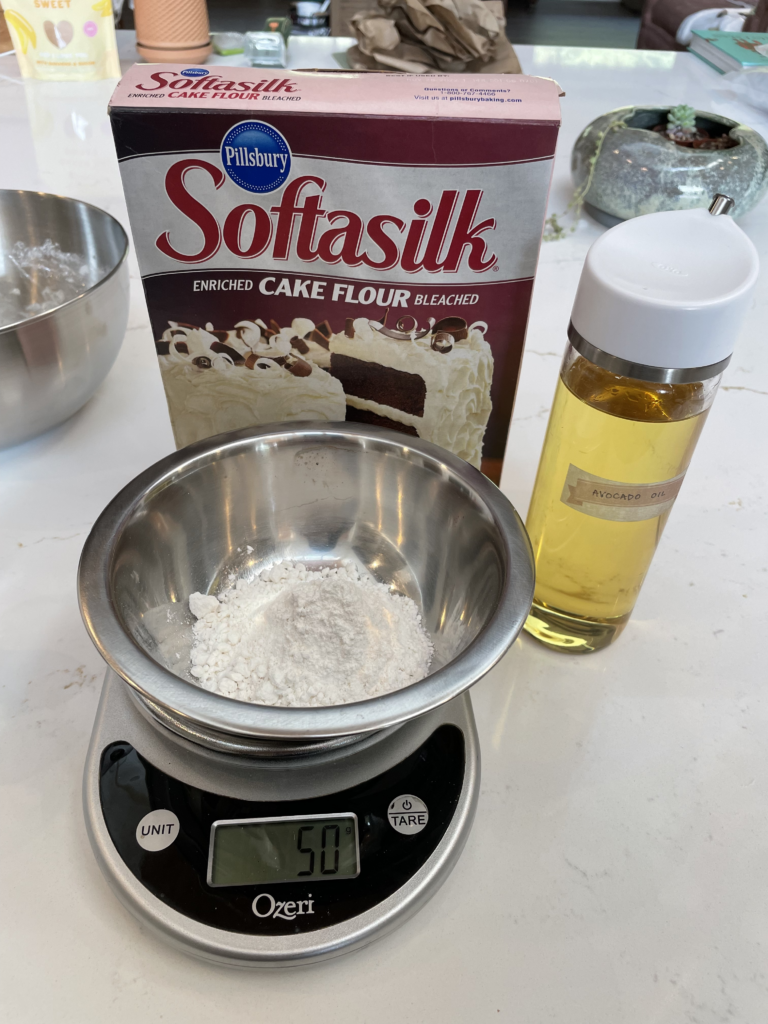
I love that this recipe is written primarily in weight measurements, and not volume measurements, because it’s much easier to get a consistent result and know that you’ve made it the way the author intended. I also love that it uses instant yeast (vs. the more common active dry yeast), since that’s what I typically keep on hand for bread baking.
I measured out the by-volume ingredients as listed, but I also weighed them in case I want to recreate the results consistently, tweak the amounts in the future, or scale the recipe easily. I find this especially important for salt, because different salts have different densities (even within “sea salt”). This can make for very different results if measuring by volume!
For reference, here’s what I got:
| Ingredient | Amount Listed in Recipe | Amount I Used (in grams) |
| Sea Salt | 1/2 tsp | 2g |
| Sugar | 1 Tbsp | 13g |
| Vegetable Oil | 1 Tbsp | 10g |
| Instant Yeast | 1/4 tsp | 0.72g (measured with a microscale) |
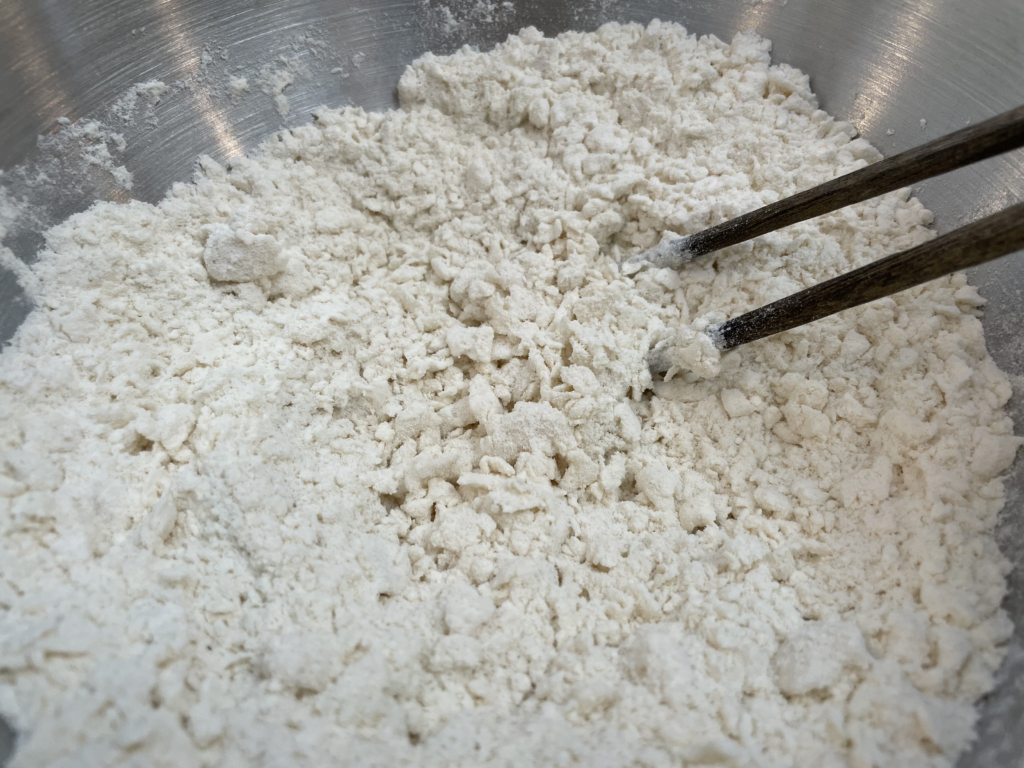
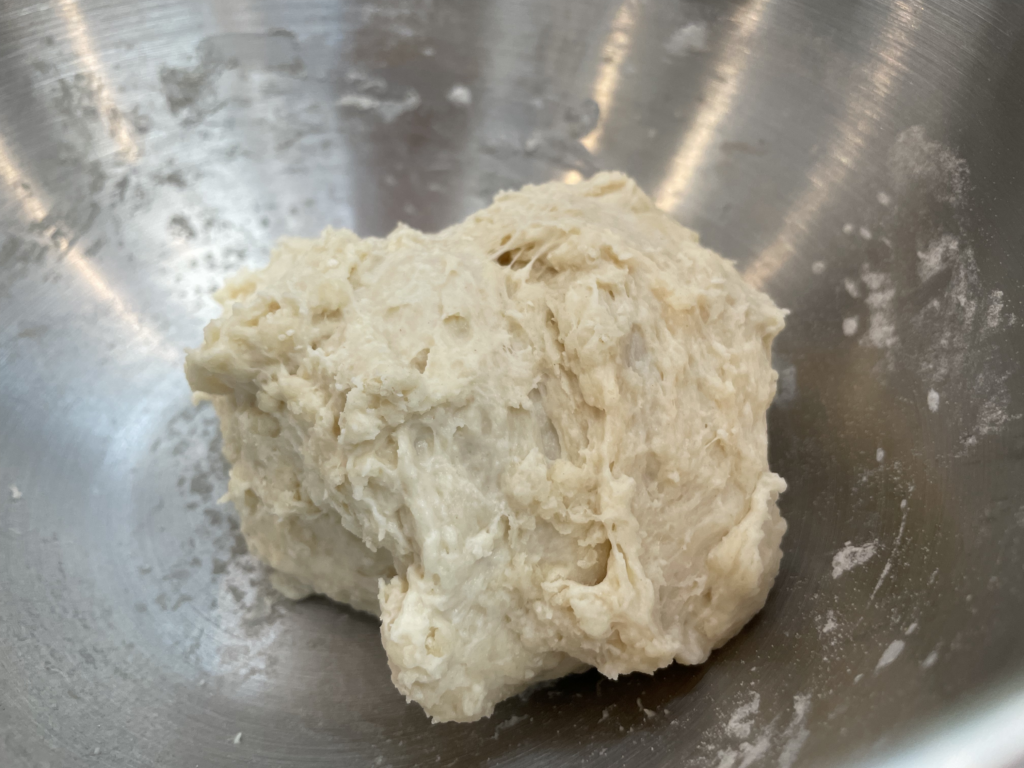
The amount of kneading in this recipe is very minimal, so it was a breeze to make the dough without a mixer! However, I think a mixer with a dough hook could be useful when making a larger batch (which I do recommend – 6 shaobing can disappear VERY quickly! 😋).
I kneaded just until there was no dry flour left. As the recipe stated, it got very sticky!
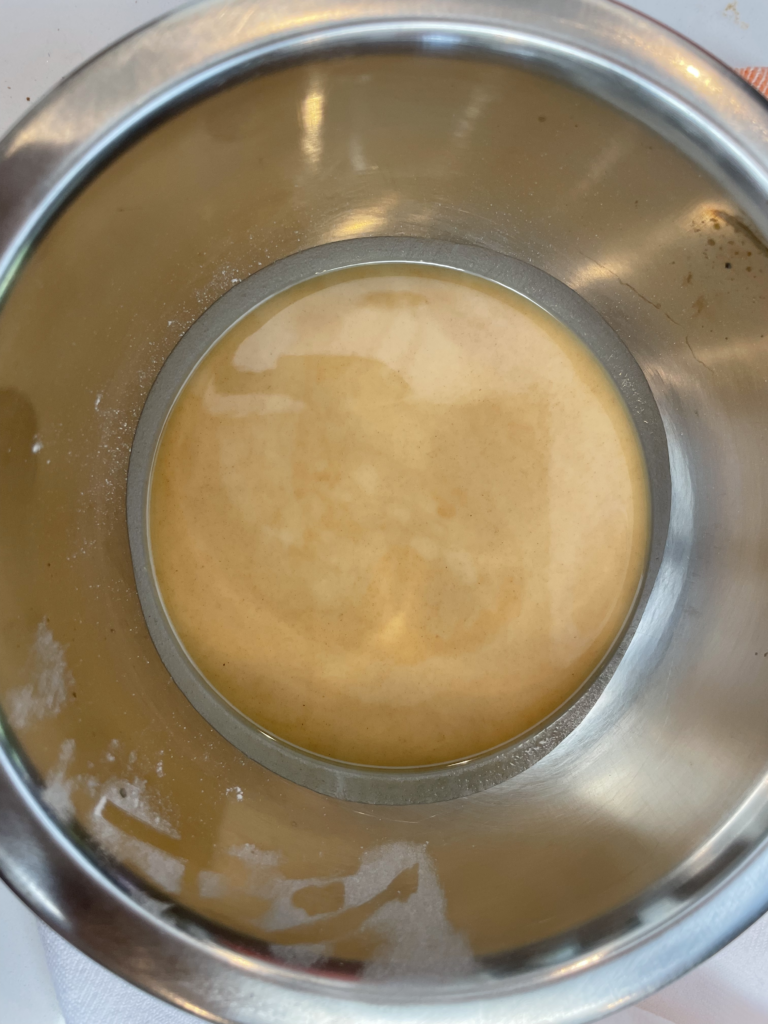
I ended up cooking my oil paste a bit darker than the pictures in the recipe, but I personally loved the fragrant, nutty flavor it took on. It cooked much slower than I expected, so I bumped the heat up from medium to medium-high to finish it off, stirring constantly to avoid burning.
Dividing & Shaping
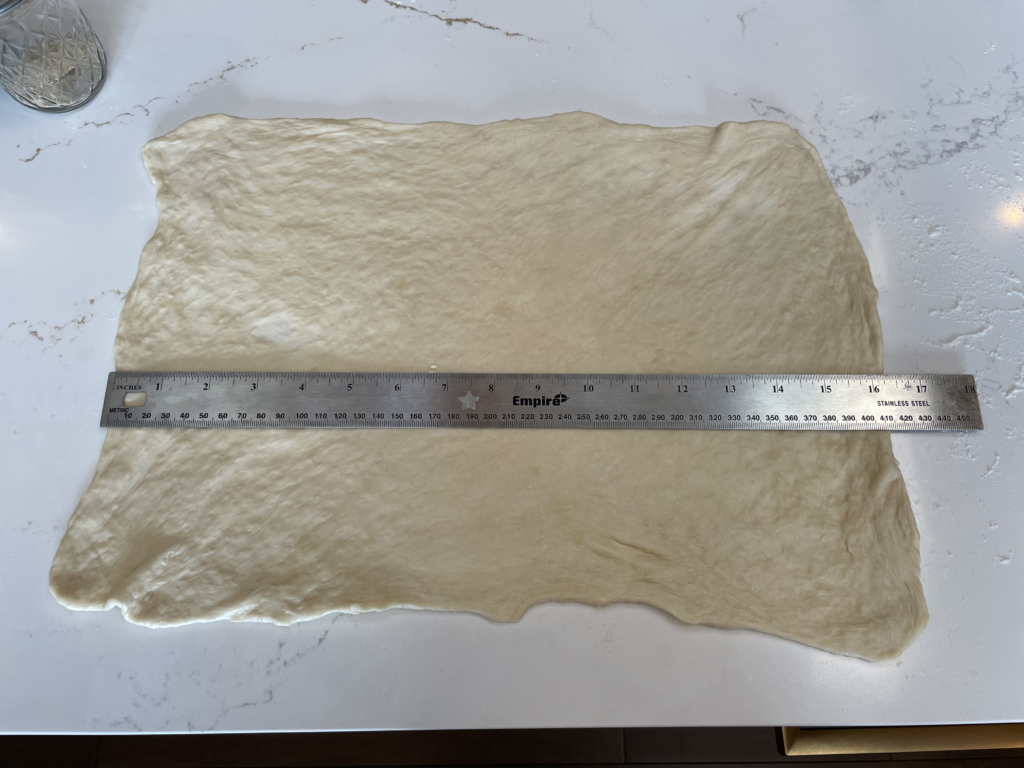
After resting, the hot water dough was very soft and extensible, making it easy to roll out into a large, thin rectangle. I found it easiest to roll at the beginning when the dough was thicker, and then switched to gentle stretching by hand to reach the full size of the rectangle.
When stretching by hand, the dough is so delicate that it’s important to stretch evenly from the thicker spots instead of pulling from the edges. I recommend gently lifting up the dough and sliding your hand under until you find a thicker spot, then using your fingertips to lightly stretch the dough from that spot.
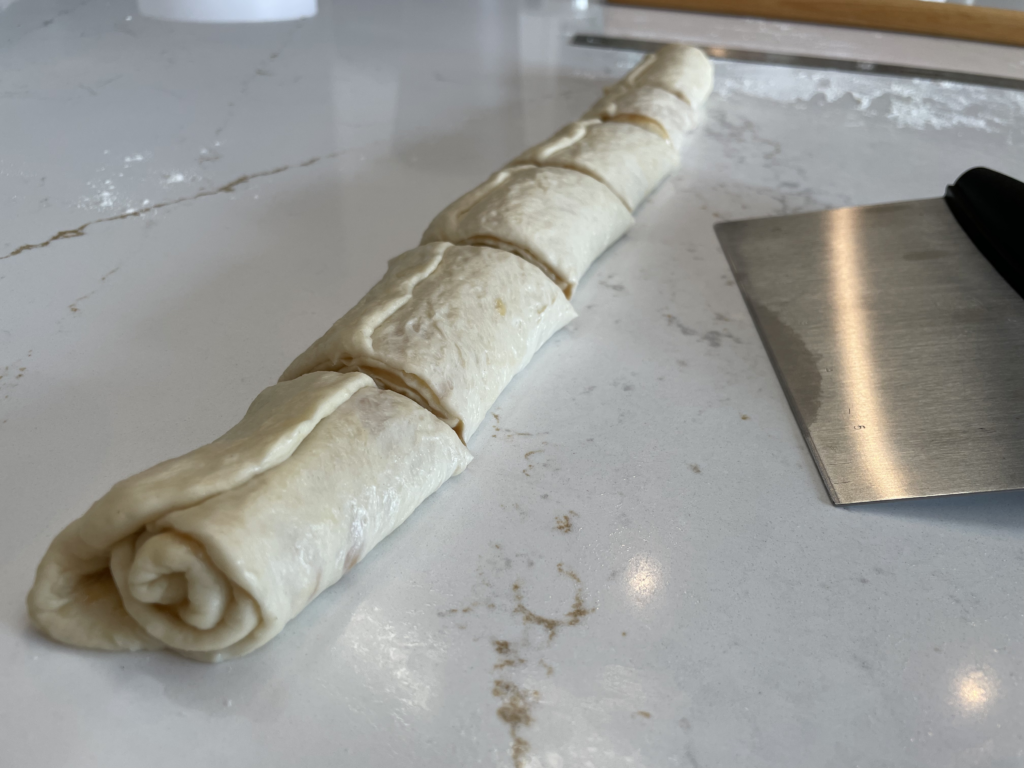
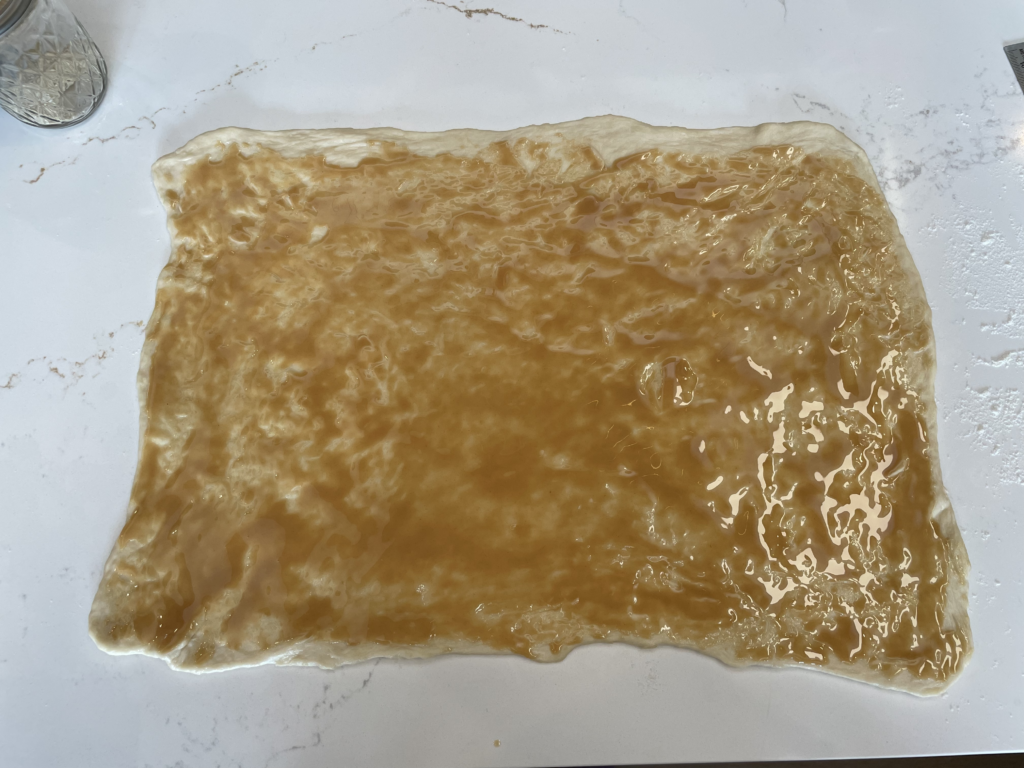
I was pleasantly surprised to see that the oil paste doesn’t seep out too quickly once you cut the roll into sections. That being said, it does still seep out slowly, so I’d suggest sealing the open edges together quickly after cutting. You could even cut and seal as you go, if you want to keep it as clean as possible.
As you can see in the photos above, in the time I stopped to take photos of the process, the paste had started coming out and I ended up with some messy smears. It ended up just fine, though!
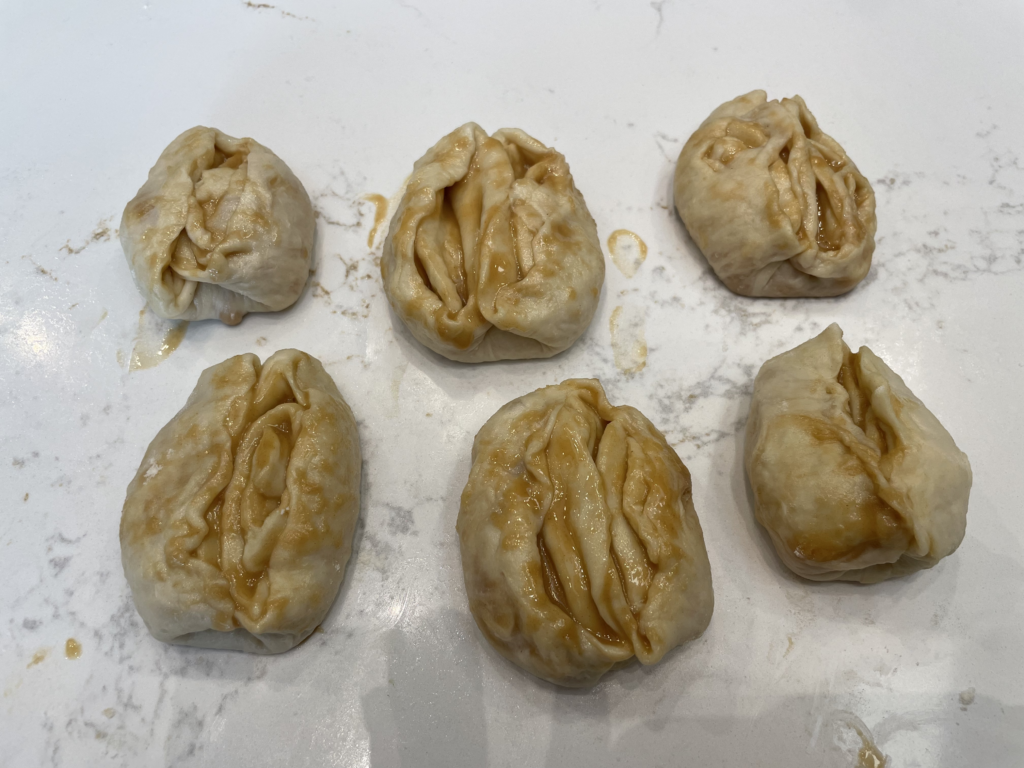
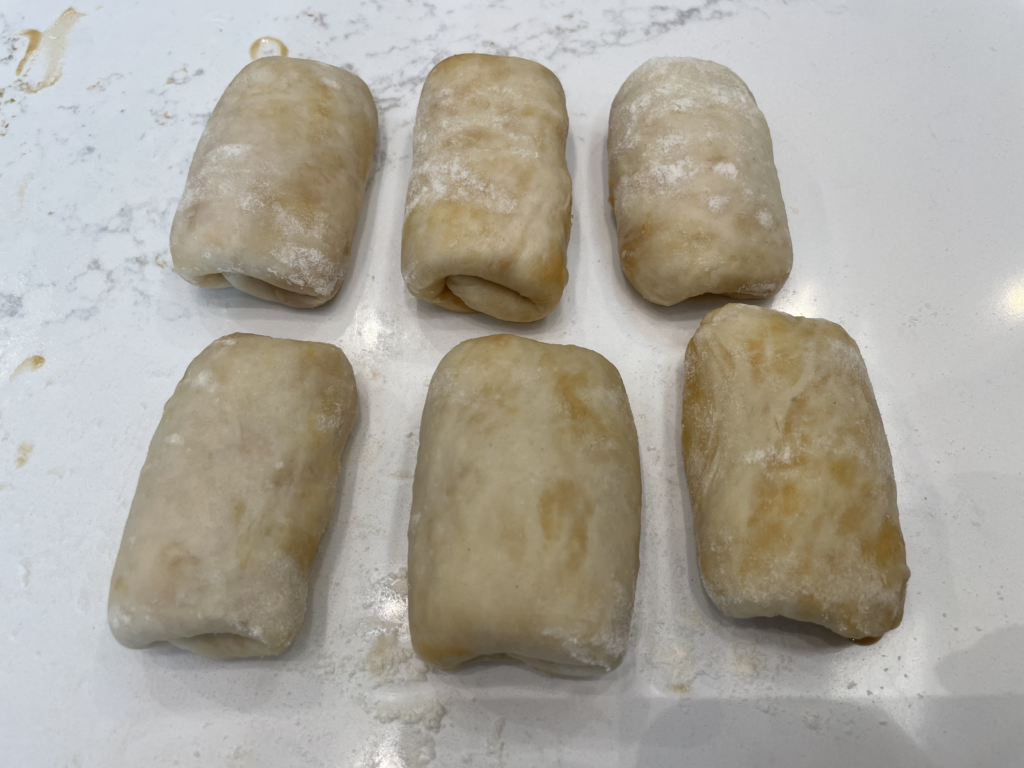
The rest of the shaping went quickly – just two rounds of rolling out and folding into little packets. I love how plump the little shaobing look pre-flattening! 😍
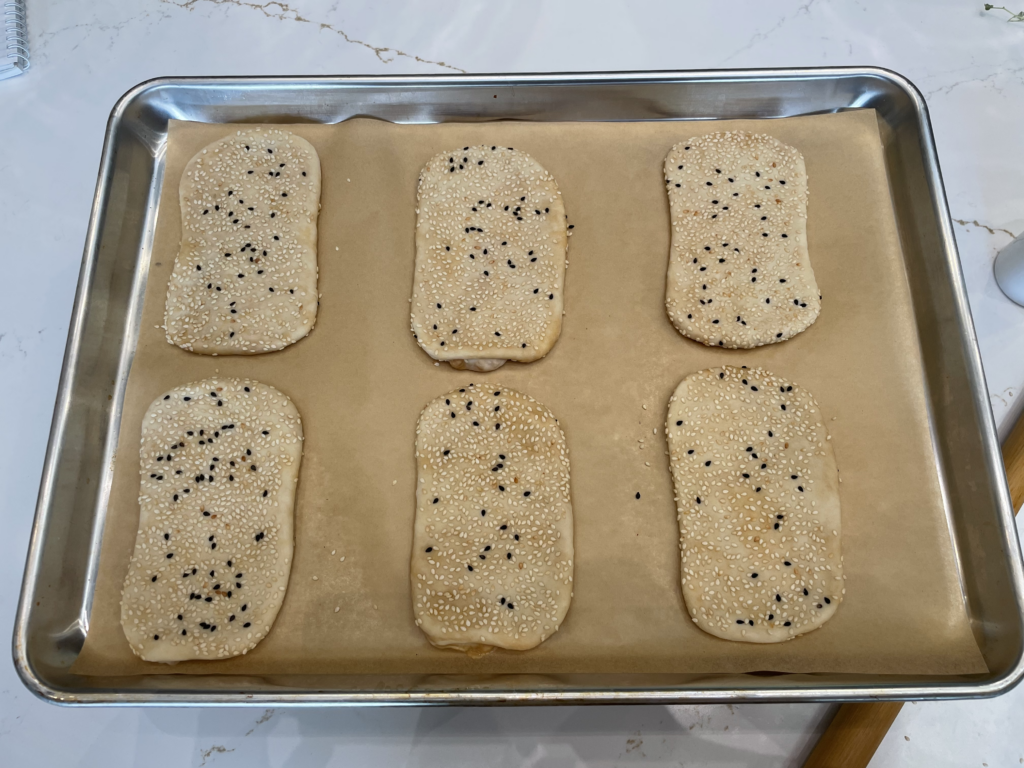
The recipe recommends rolling the final shaobing out to roughly 6″ x 3″, but I found that I was only able to get mine to around 5″ long. I think the most important part is to get them to a good thickness. Mine ended up around 1/8-1/4″ thick, which turned out well.
Baking & Eating
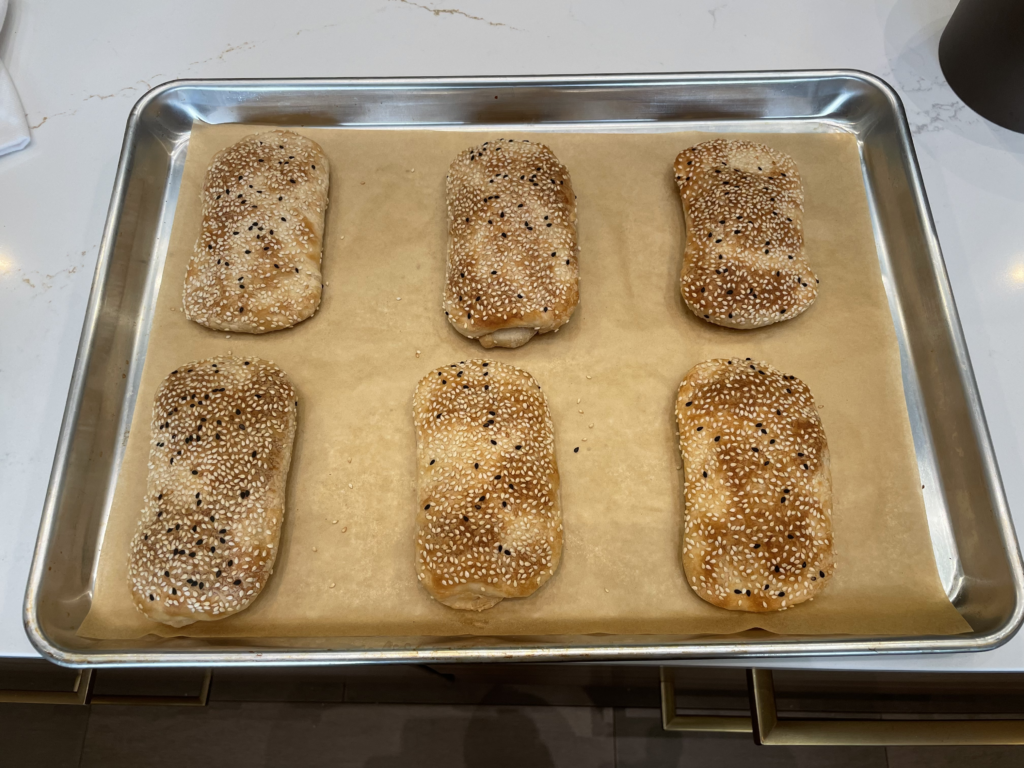
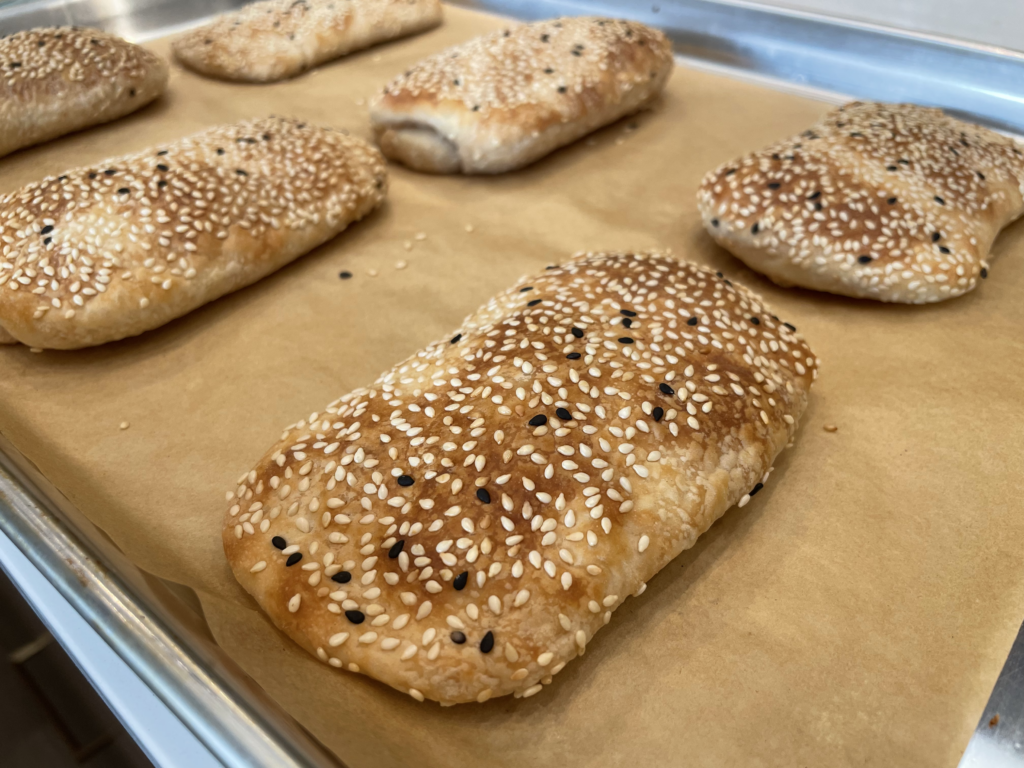
To my delight, 6 shaobing fit neatly onto a half-sheet baking pan, and the baking time on the recipe was accurate (mine took 13 minutes). They baked up puffy, flaky, and deliciously golden brown. Yum!
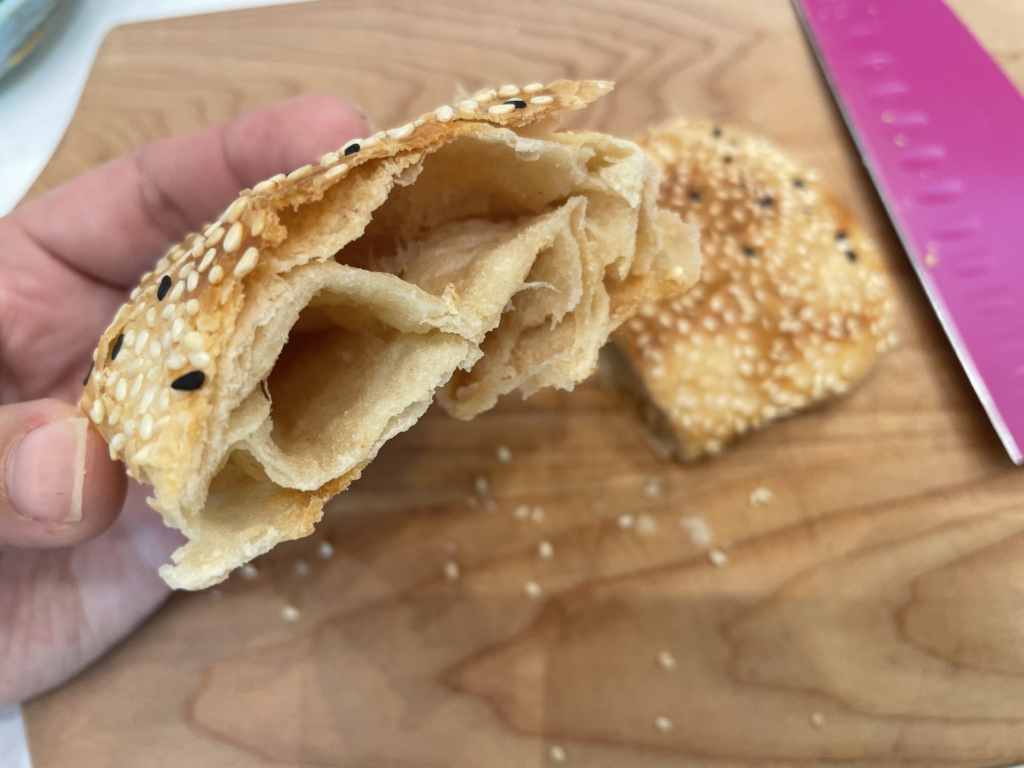
When I cut into the shaobing, I could see the separate layers created by the oil paste spread between thin layers of dough.
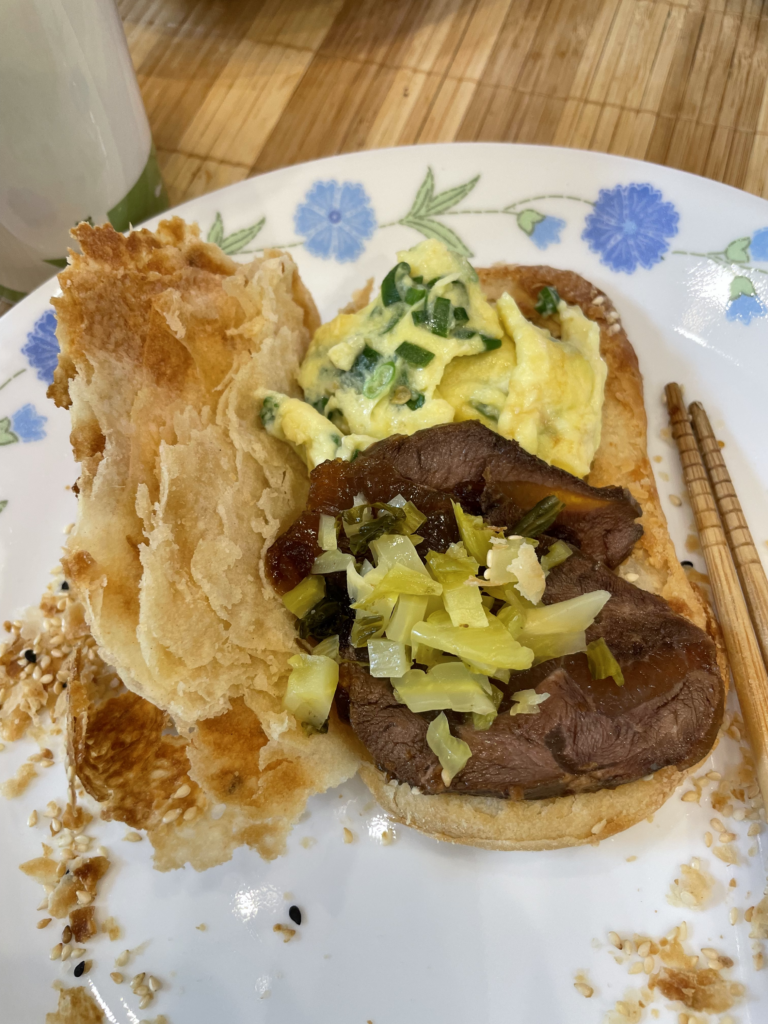
We had the shaobing plain that day, and then again for breakfast with friends the next day stuffed with egg with green onion, thin slices of braised beef shank, and pickled vegetables. They were delicious both ways! The tops of the shaobing were delicately crisp, and the insides were layered and fluffy with some chewiness.
My Tips for Making This Recipe
Toasting Sesame Seeds
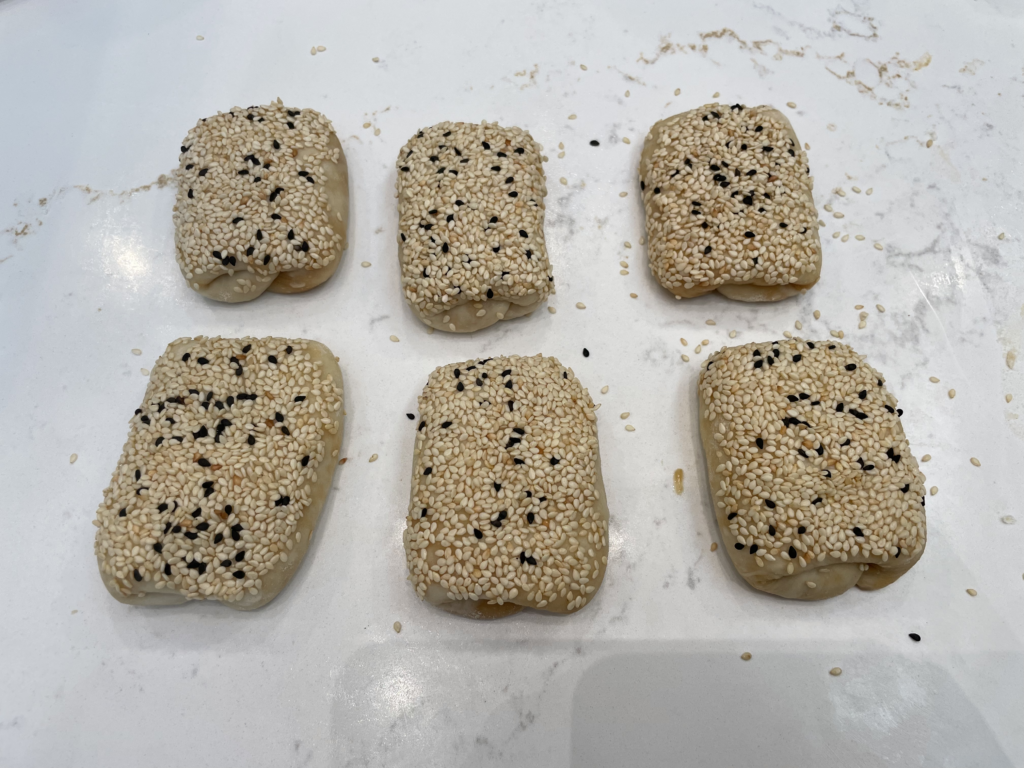
This recipe asks for toasted sesame seeds, which you can buy pre-toasted. However, if you don’t have them available but you do have raw sesame seeds, you can easily toast them yourself!
I toasted mine spread out on a small baking pan in the oven at 350ºF for roughly 10-15 min, checking and shaking them occasionally, until they looked lightly browned all over.
If you’re tight on time and didn’t get a chance to pre-toast your sesame seeds, putting raw sesame seeds on is just fine, too! However, after having tried it both ways, my husband and I both agree that pre-toasting the seeds does result in a more delicious, fragrant flavor.
Getting Sesame Seeds to Stick Evenly
Seeds won’t stick to dry spots (for example, areas you’ve dusted with flour). If the surface of your dough is too dry, you can use a very fine misting of water to make dry spots slightly damp before dipping in the seeds. That will make them stick! I use this FLAIROSOL Continuous Mist Spray Bottle, but any fine mist spray such as a plant mister would work well.
Scaling Up the Recipe
I’ve made a 2x batch of this recipe, and it does scale up well without complications. I’d just suggest splitting your dough up (for example, 2 halves for a 2x batch) to roll into large rectangles before spreading the oil paste – otherwise, rolling out and then rolling up a really long, thin dough can get tricky. (But if you have the counter space and can manage it, go for it!! I’ve done it both ways – multiple rolls are easier to handle, but with one large one, you don’t have to fuss over splitting up your oil paste.)
It took me 16-19 minutes to bake two trays of 6 shaobing at 425ºF. After several more trials, I’ve found that baking multiple trays at 400ºF convection yields great results in 12-14 minutes.
Storing & Reheating
As with most breads or biscuits, I suggest wrapping and freezing any shaobing you aren’t planning to eat that day.
I’ve been vacuum sealing mine in these FoodSaver Reusable Quart Vacuum Zipper Bags, just vacuuming enough to remove air around the shaobing without crushing them. I love the quart size bags for me and my husband, since one bag will hold 2-3 shaobing, which is typically enough for a breakfast for us.
If you aren’t going the vacuum sealing route, you can also wrap them in plastic wrap (individually or in bundles) and seal them in a zip-top bag. Remove as much air from the bag as you can while sealing it to stave off freezer burn.
I put the frozen shaobing directly in my toaster oven to toast, and they warm up beautifully in just 5-6 minutes. That’s just the right amount of time for me to whip up some scrambled egg with green onions to stuff inside! 😋
Cutting Open Shaobing for Stuffing
I’ve found that the easiest way to cut the shaobing open like a book is to use sharp kitchen shears. Just jab one side of the shears into the end of the shaobing and snip all the way around three sides so you can open it up.
Alternatively, you can use a serrated knife to slice them open, but for me, this approach is messier and trickier to get a nice, even “butterfly”. Be careful when cutting a toasted shaobing, because the inside will be hot!
Post Updates
Oct. 23, 2023: Updated section on Toasting Sesame Seeds based on my experience trying both toasted and untoasted seeds. Also added additional recommendations to the Scaling Up the Recipe section based on several more trials of the recipe.